MONEY S4/S5 CONNECTOR
Page contents
Why Use Money S4/S5 Connector
If you already use Money S4/S5 software for record keeping and want to take advantage of the benefits offered by CDESK, you do not have to manually copy data from CDESK to Money. For this purpose, we have developed the Money S4/S5 connector which links Money S4/S5 to CDESK. The current state of the connector allows you to:
- load and link companies from Money to CDESK
- load stock cards from Money to CDESK
- record orders in Money based on data from CDESK
Communication Between CDESK and Money S4/S5
The communication is initiated by CDESK, which connects to the Money S4/S5 API interface.

CDESK and Money S4/S5 communicate via API interface of Money S4/S5 software. CDESK only sends the REST API to this software. The basic components for communication are shown in the following diagram.

Preparation on the Money S4/S5 Side
On the Money S4/S5 side, an API must be installed, which is described in further detail directly on the Money S4 page.
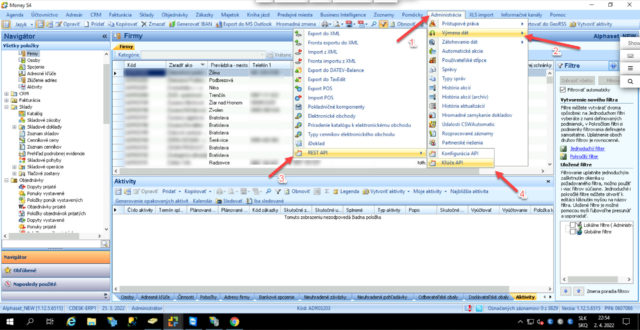
After successful installation of the REST API, open Money S4/S5. In the top bar, click Administration -> Data Exchange and if the REST API installation was done correctly, the REST API option will be listed. In the REST API section, first select the API Configuration option.
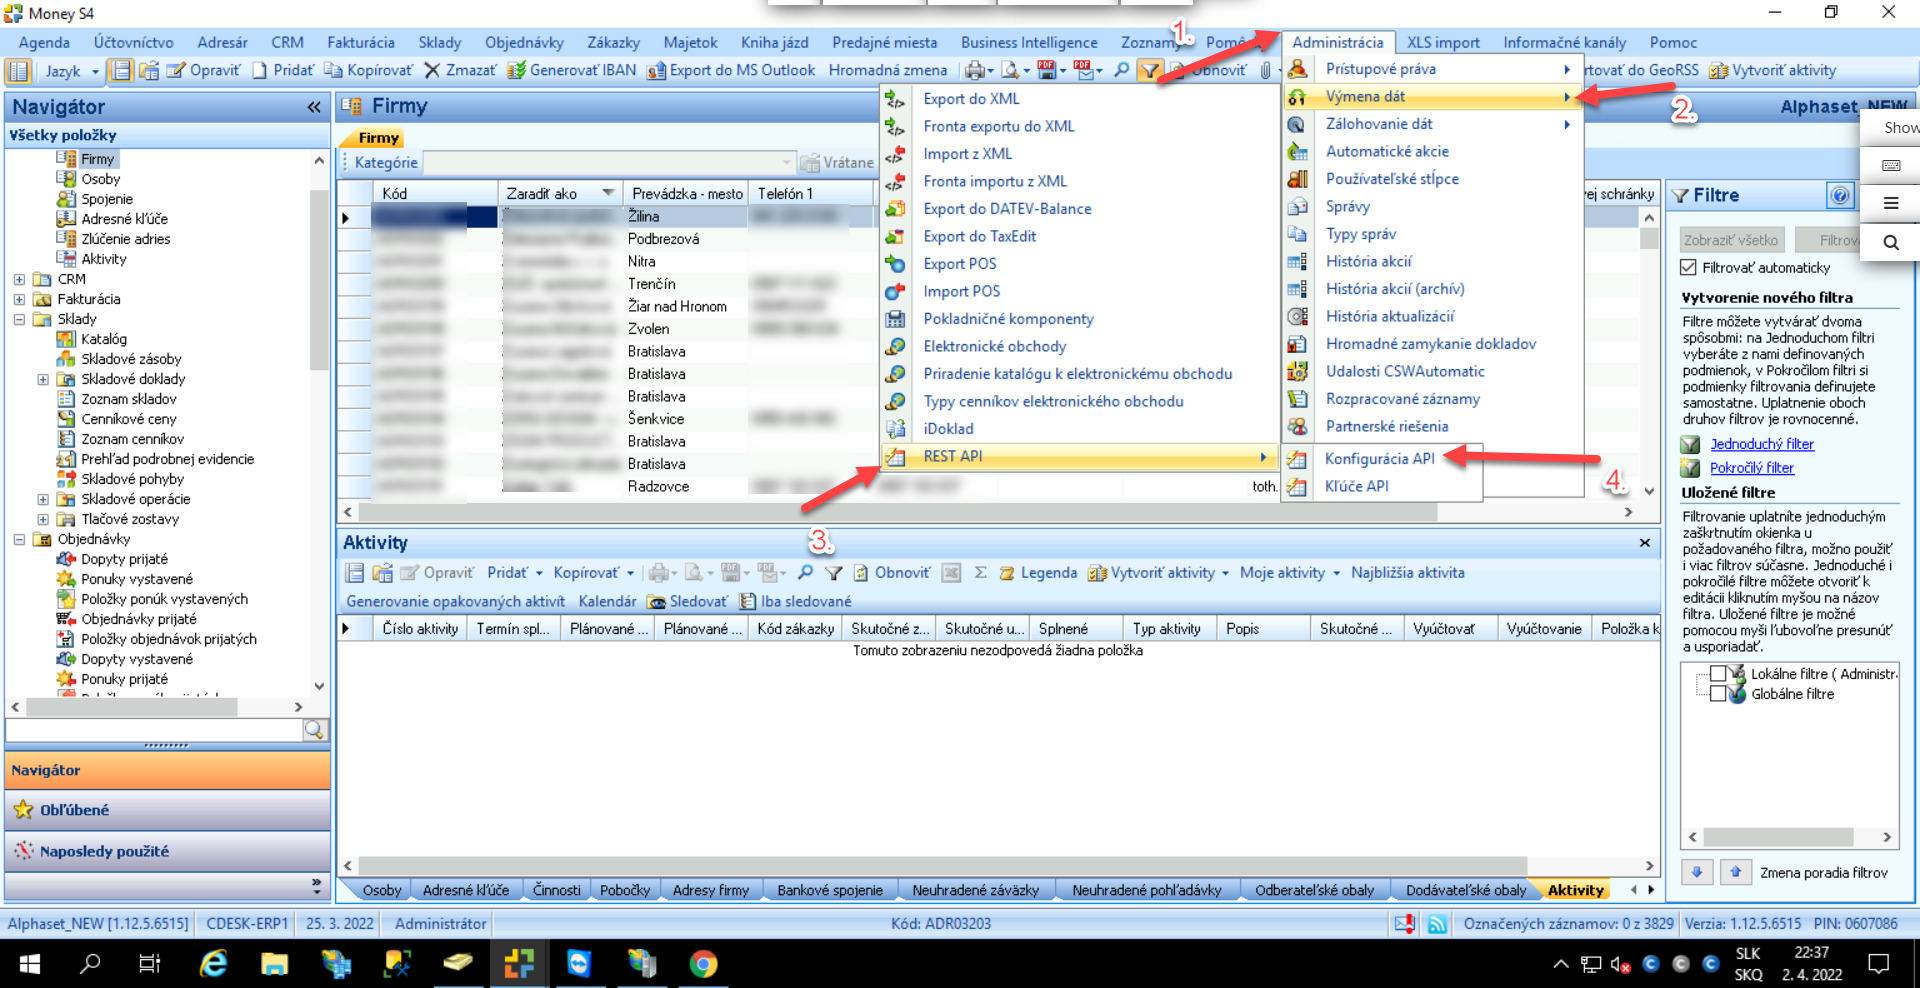
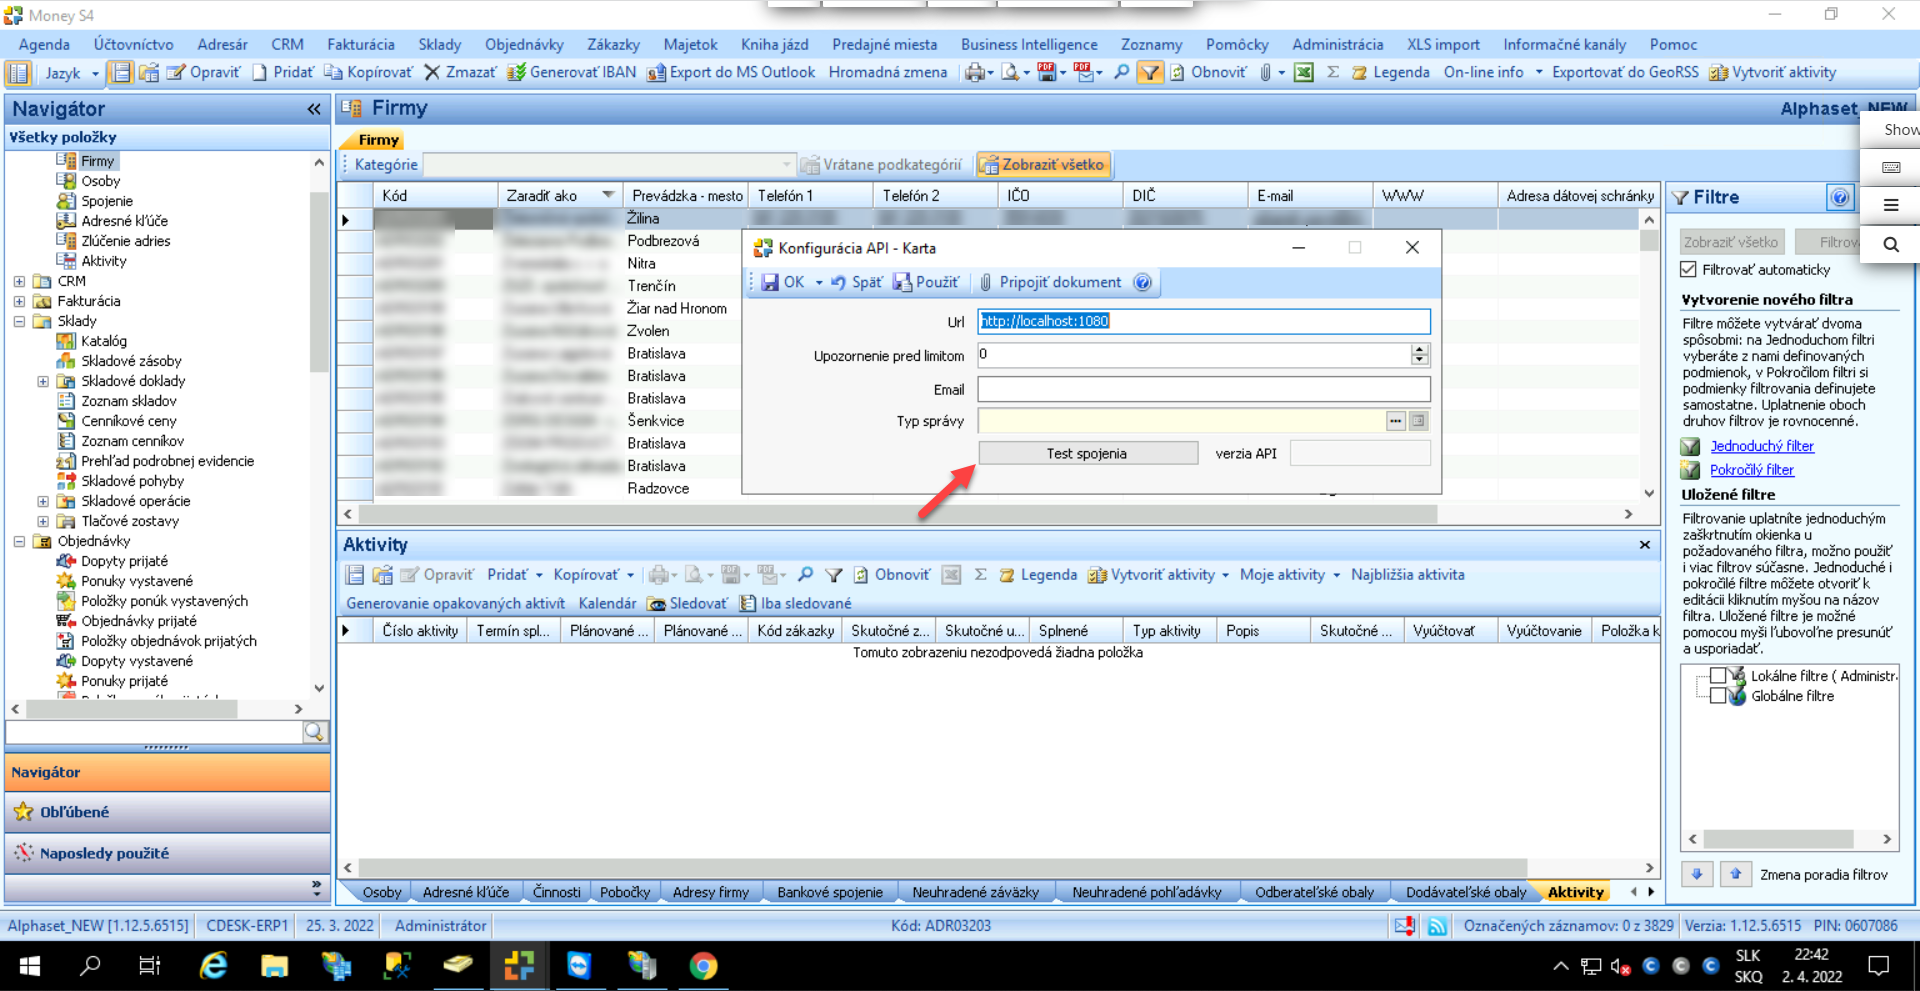
When clicked, a modal window will appear in which the Money Server URL must be entered as well as the port number. For example, the URL can be in the form: http://localhost:1080. Then click on the Test Connection button. If the address is entered correctly, a message will appear to indicate that the test was successful.
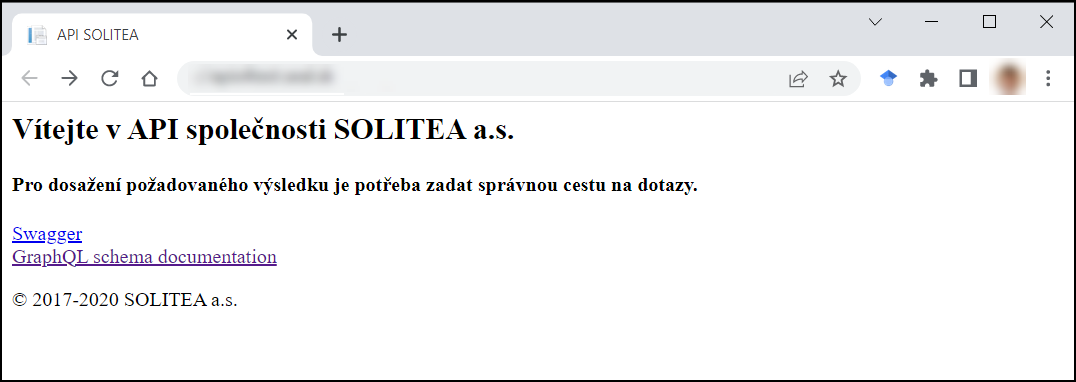
If the S5 API interface is configured correctly, you will see the following response on the page where the API is to be run:
After a successful test, API keys can be obtained. They will be inserted into CDESK when configuring the connector. To get the key in Money S4/S5, click in the top bar on Administration -> Data Exchange -> REST API -> API Keys.
When clicked, a new window will appear with the Client ID and Client Secret columns. This data will be entered into CDESK when configuring the connector.
Set up the CDESK and Money S4/S5 Connection
After setting the configuration on the Money S4/S5 side, you can add a connector to the CDESK.
Add Money S4/S5 Connector in CDESK and Activate Money S4/S5 REST API
To add a Money S4/S5 connector, go to Global Settings -> Connectors, API and then click +Add connector.

When clicked, a window will appear with a selection of the connector type. Select Money S4/S5. Then click -> Continue.

The connector configuration form is then displayed containing the following fields:
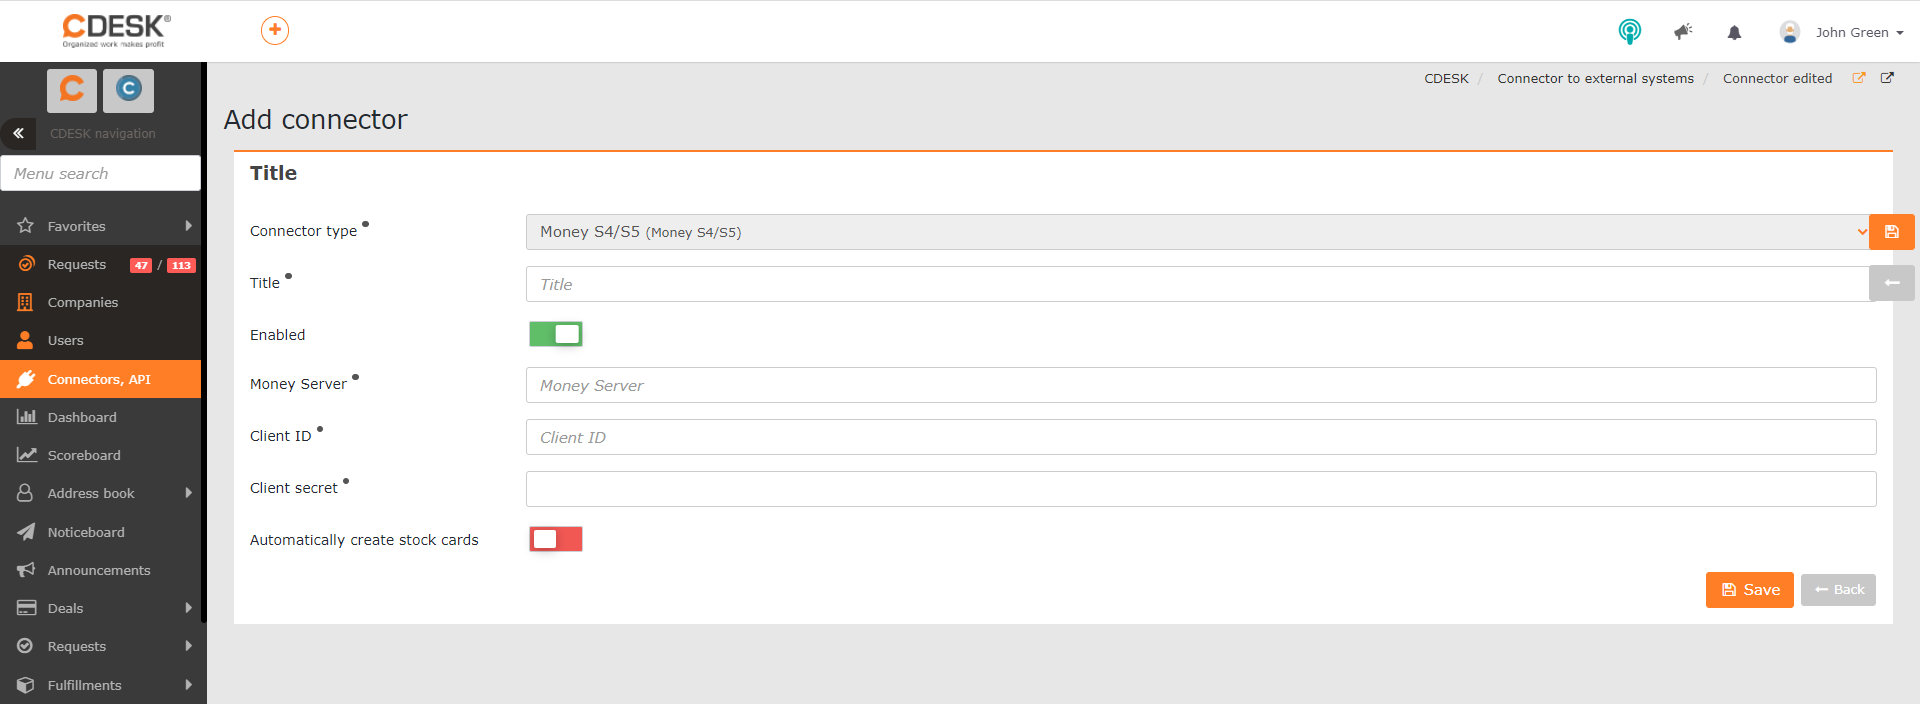
Connector Type – When adding a Money S4/S5 connector, this field is pre-filled with Money S4/S5. This setting is not editable and is just for the userʼs information on the connector they are adding.
Title – The name under which the connector appears in the list of connectors. It is possible to insert any name.
Enabled – The connector can only be used if the switch is turned to the on position ![]()
Money Server – Enter the URL where the Money S4/S5 interface (S5 API module) is configured.
Client ID – Enter the Client ID code found in Money S4/S5 under Administration -> Data Exchange -> REST API -> API Keys, after you have successfully configured the REST API on the Money S4/S5 side.
Client Secret – Enter the Client Secret code, which can be found in Money S4/S5 under Administration -> Data Exchange -> REST API -> API Keys, after you have successfully configured the REST API on the Money S4/S5 side.
AAutomatically Create Stock Cards – If the switch is in the on position ![]() , after synchronization with Money S4/S5, stock cards will be automatically created in CDESK based on the catalog items in Money S4/S5.
, after synchronization with Money S4/S5, stock cards will be automatically created in CDESK based on the catalog items in Money S4/S5.
Once you have filled in all the fields, save your settings by clicking Save, located in the bottom right corner. The data from Money S4/S5 are then loaded and new tabs appear for further settings.
Link the Money Company with the CDESK Company
After synchronization, the Money S5 Companies tab loads all companies registered in Money S4/S5, displaying in the list their Money ID and the name under which they are registered in Money S4/S5. In the left corner above the list, there is a Refresh button,which is used to start the synchronization if changes have been made to the connector settings. There is a tool in the upper right corner that allows you to flip through the pages of the list.

In the list it is possible to link Money company to company in CDESK or create a new company in CDESK based on a Money S4/S5 record.
To link Money company to existing company in CDESK, click on the menu icon ![]() at the end of the line of the company you want to link, select Link to Existing Company.
at the end of the line of the company you want to link, select Link to Existing Company.
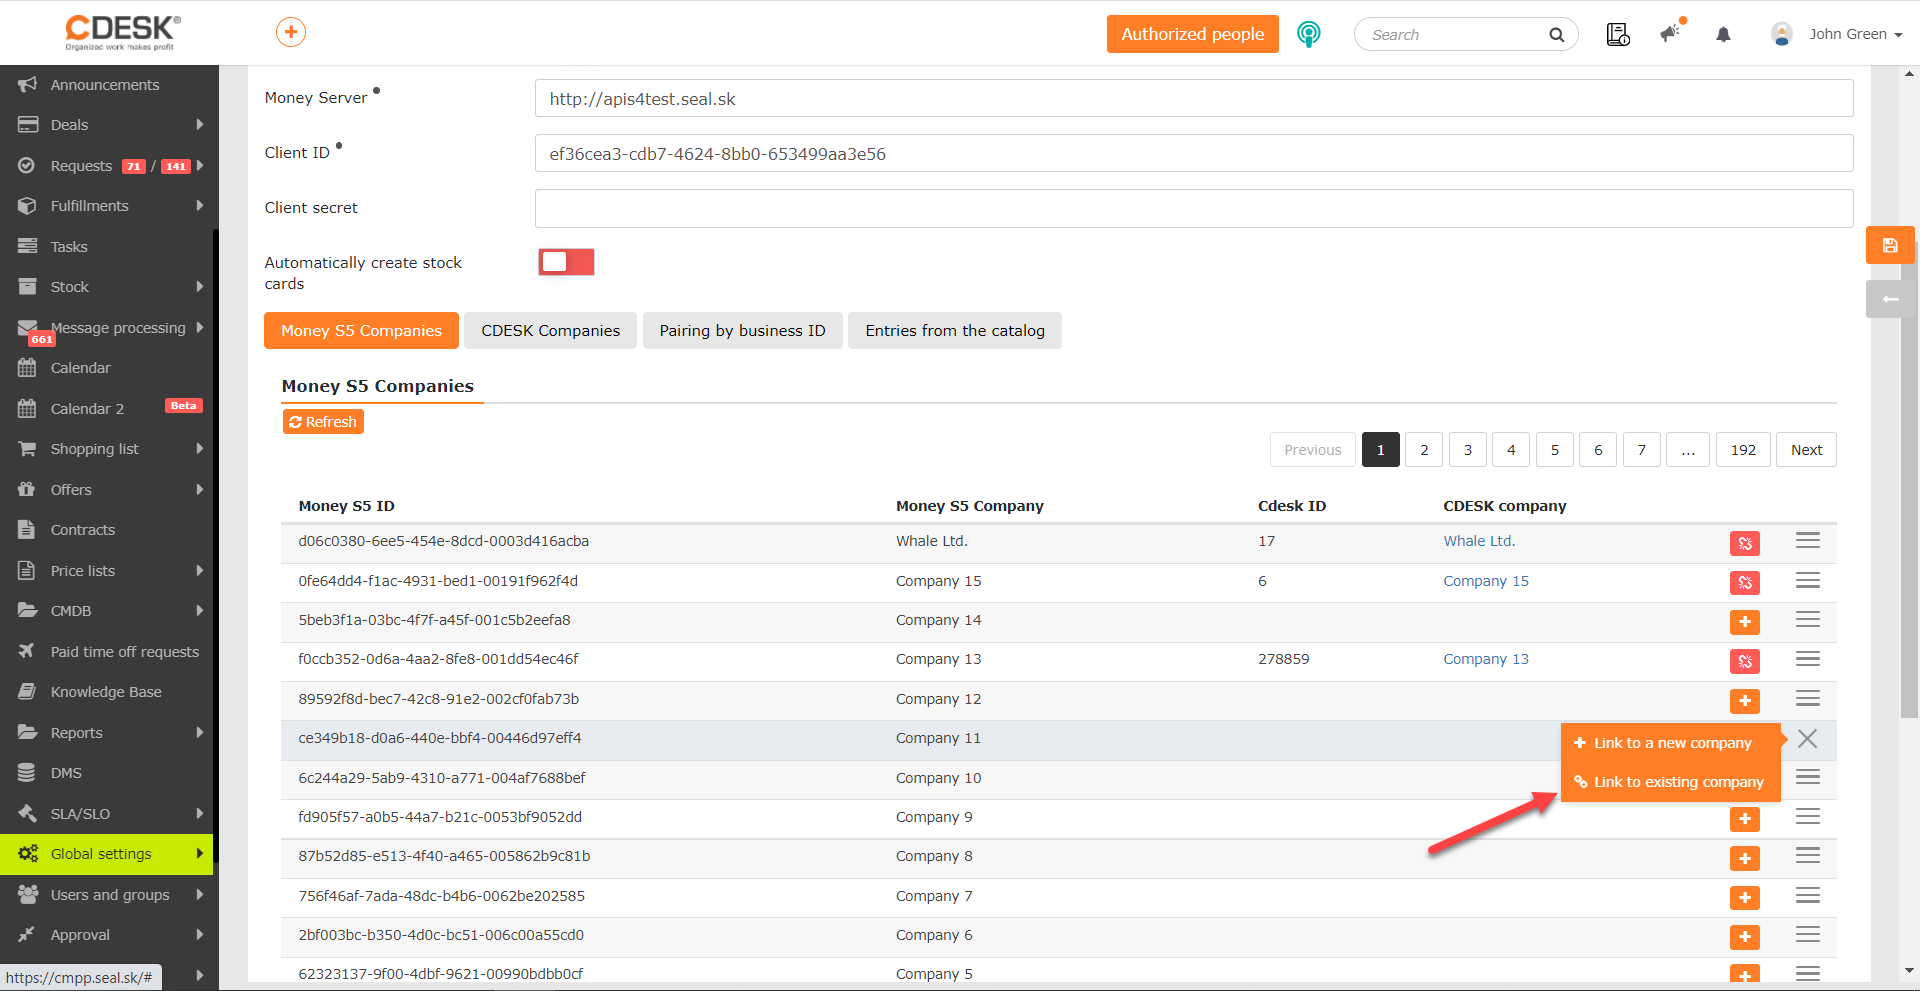
After clicking, the list of companies in CDESK will be displayed. This is the list that can be found in CDESK under Address Book -> Companies. To select a company, click on its name. Once paired, the name and ID of that CDESK company will be displayed in the Money Companies row.
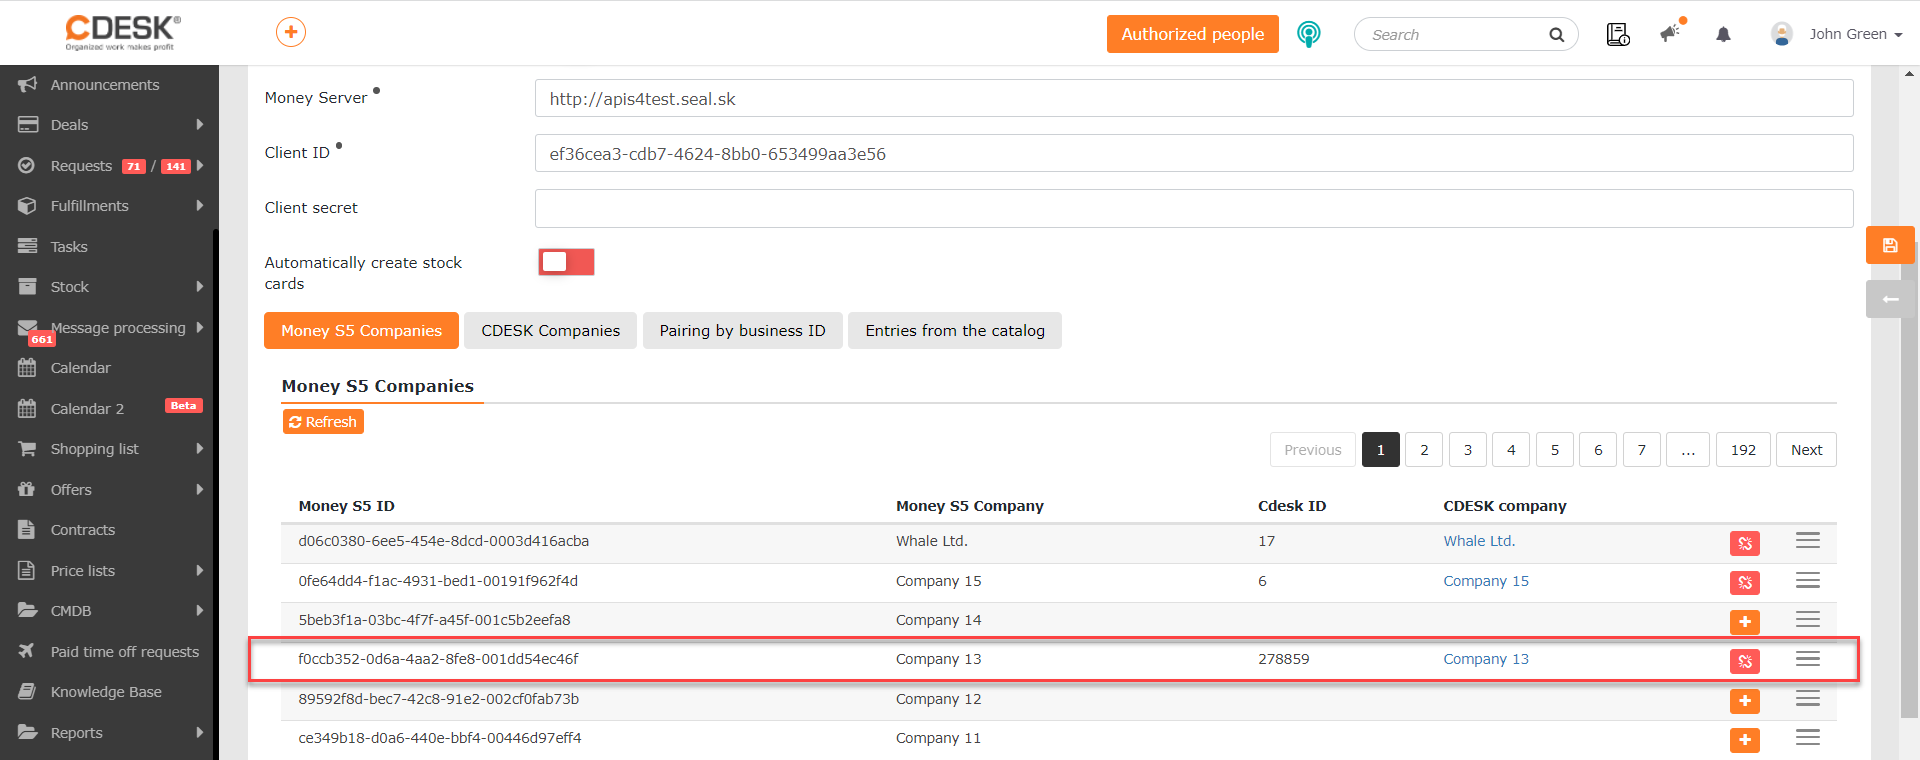
If you need to create a new company in CDESK based on a Money company, click on the + vicon in the row of the Money company, or go to the menu ![]() and select Link to a New Company.
and select Link to a New Company.
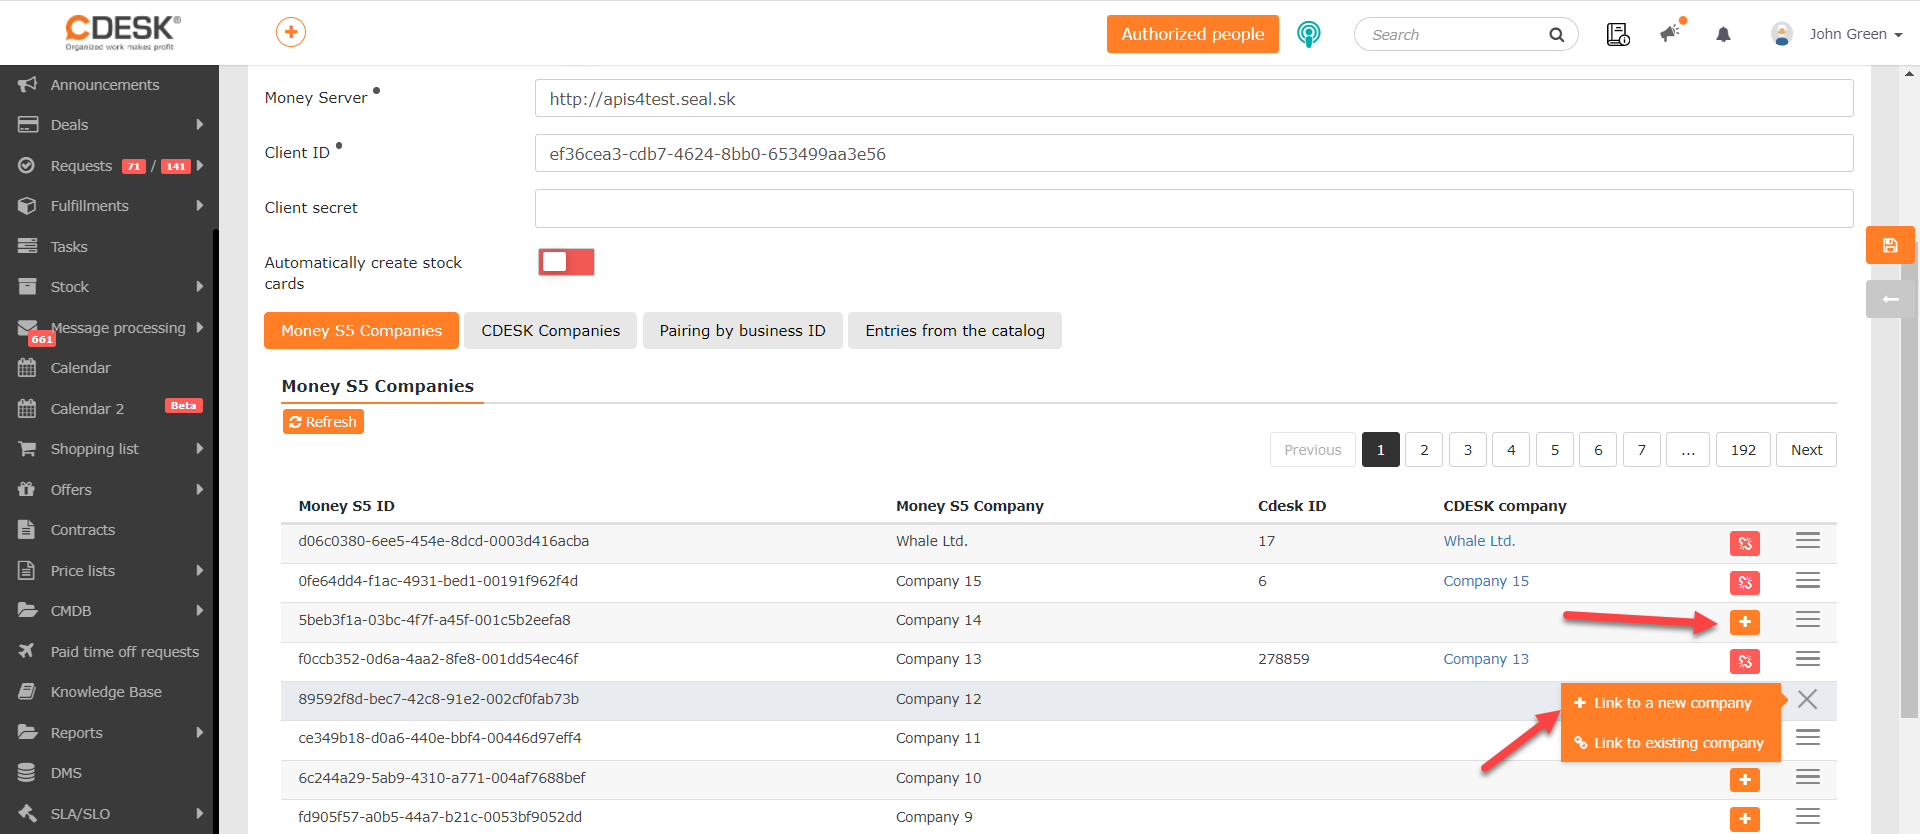
PoWhen clicked, the form for creating a new company is displayed, with all the Money company fields pre-filled. All these pre-filled options can be changed as needed. For a detailed description of this form, as well as instructions on how to continue working with the created CDESK company, see this article. To save the company, click the Save button located in the bottom right corner of the form. The name and ID of the CDESK company will be displayed in the Money Company row, just as when linking to an existing company.
If necessary, the connected company can be edited. To edit, click on ![]() at the end of the row of the company with the linked company you want to edit and select Edit Linked Company.
at the end of the row of the company with the linked company you want to edit and select Edit Linked Company.
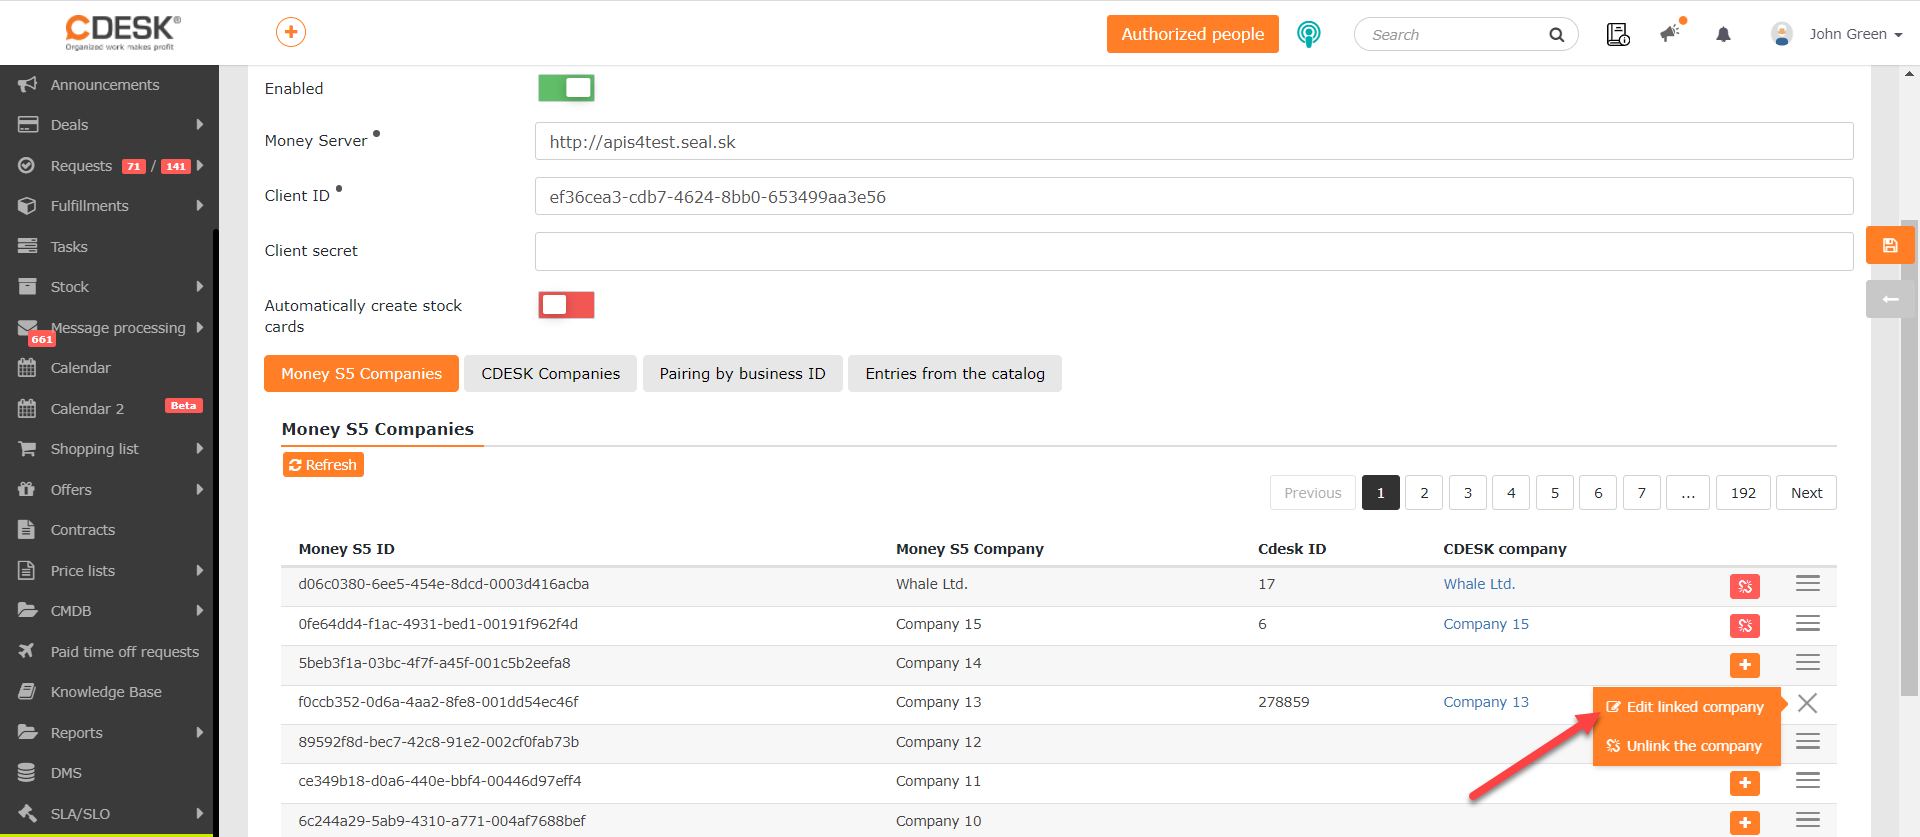
After clicking, the company form is displayed. Editing a company is described in detail in the article dedicated to CDESK companies. Only a user with the appropriate permissions can edit companies. Therefore, if you cannot edit the company form, check the permissions in Users and Groups -> Users -> specific user -> Permissions -> Address Book -> Companies -> Records.
If you need to remove the link, click on ![]() , or click on
, or click on ![]() and select Unlink the Company.
and select Unlink the Company.
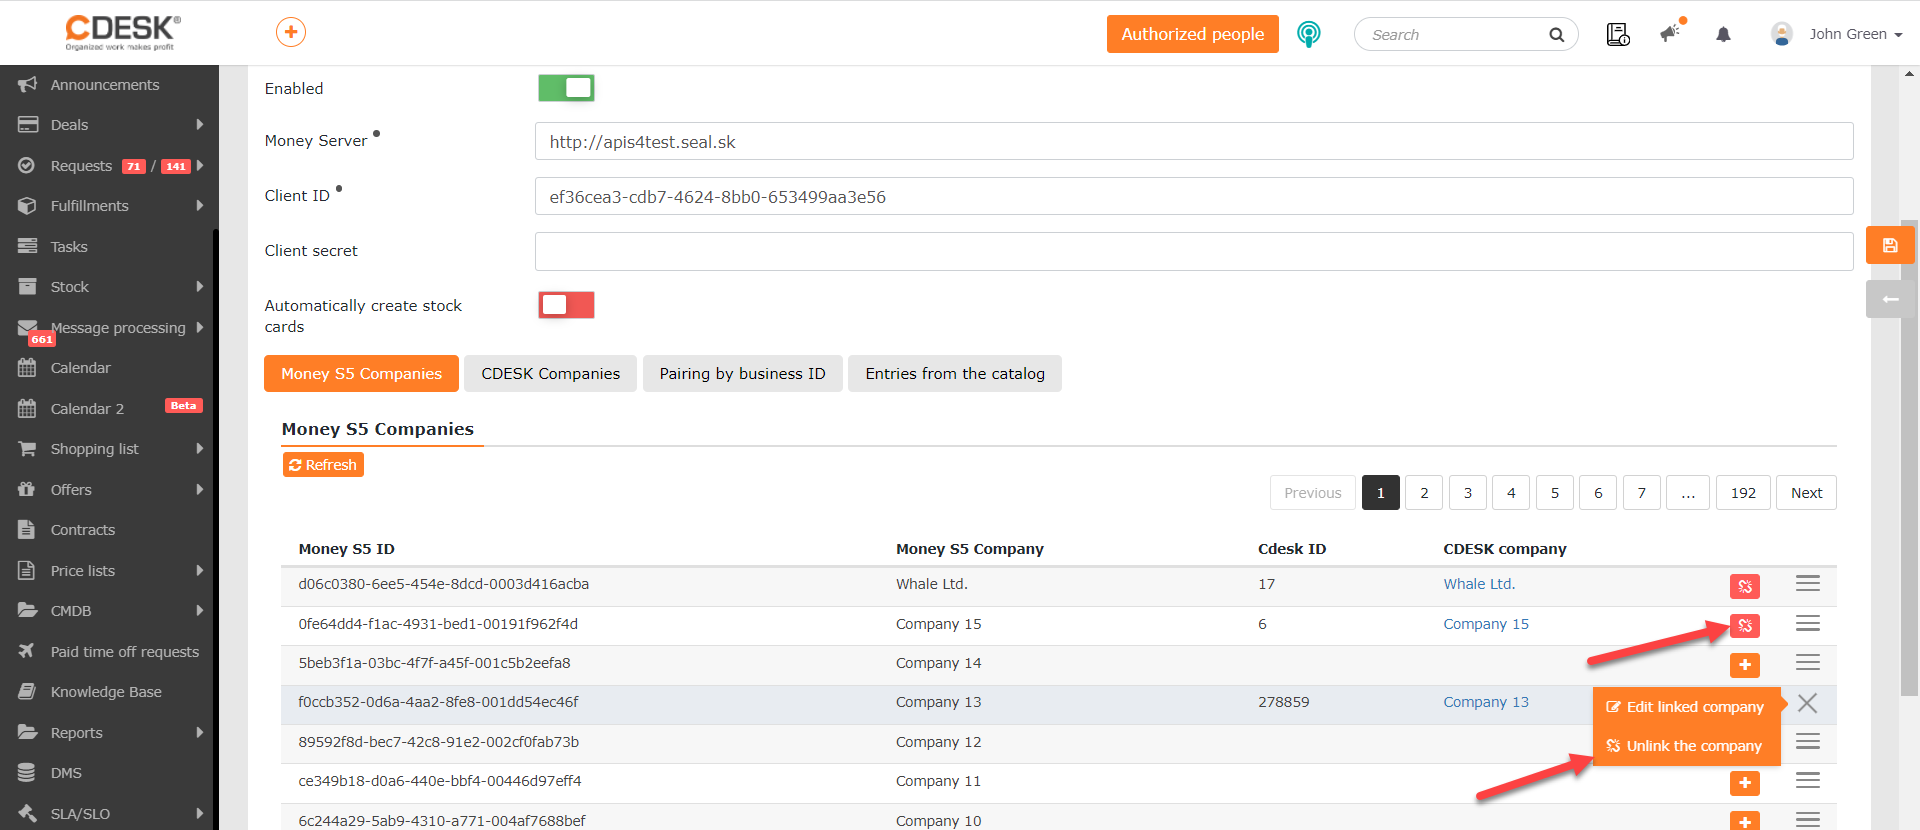
When clicked, you will be shown a message asking if you really want to remove the link. If you do, click Delete.
Create Companies in Money S4/S5
Creating Money companies from CDESK companies is possible on the CDESK Companiestab that appears after synchronization with the Money server. The tab displays the CDESK companies registered in Adress book -> Companies, showing their CDESK ID and the title under which they are registered in CDESK. Above the list, in the left corner, there is a Refreshbutton, which is used to start the synchronization if changes have been made to the connector settings. In the upper right corner, there is a tool that allows you to scroll through the pages of the list.
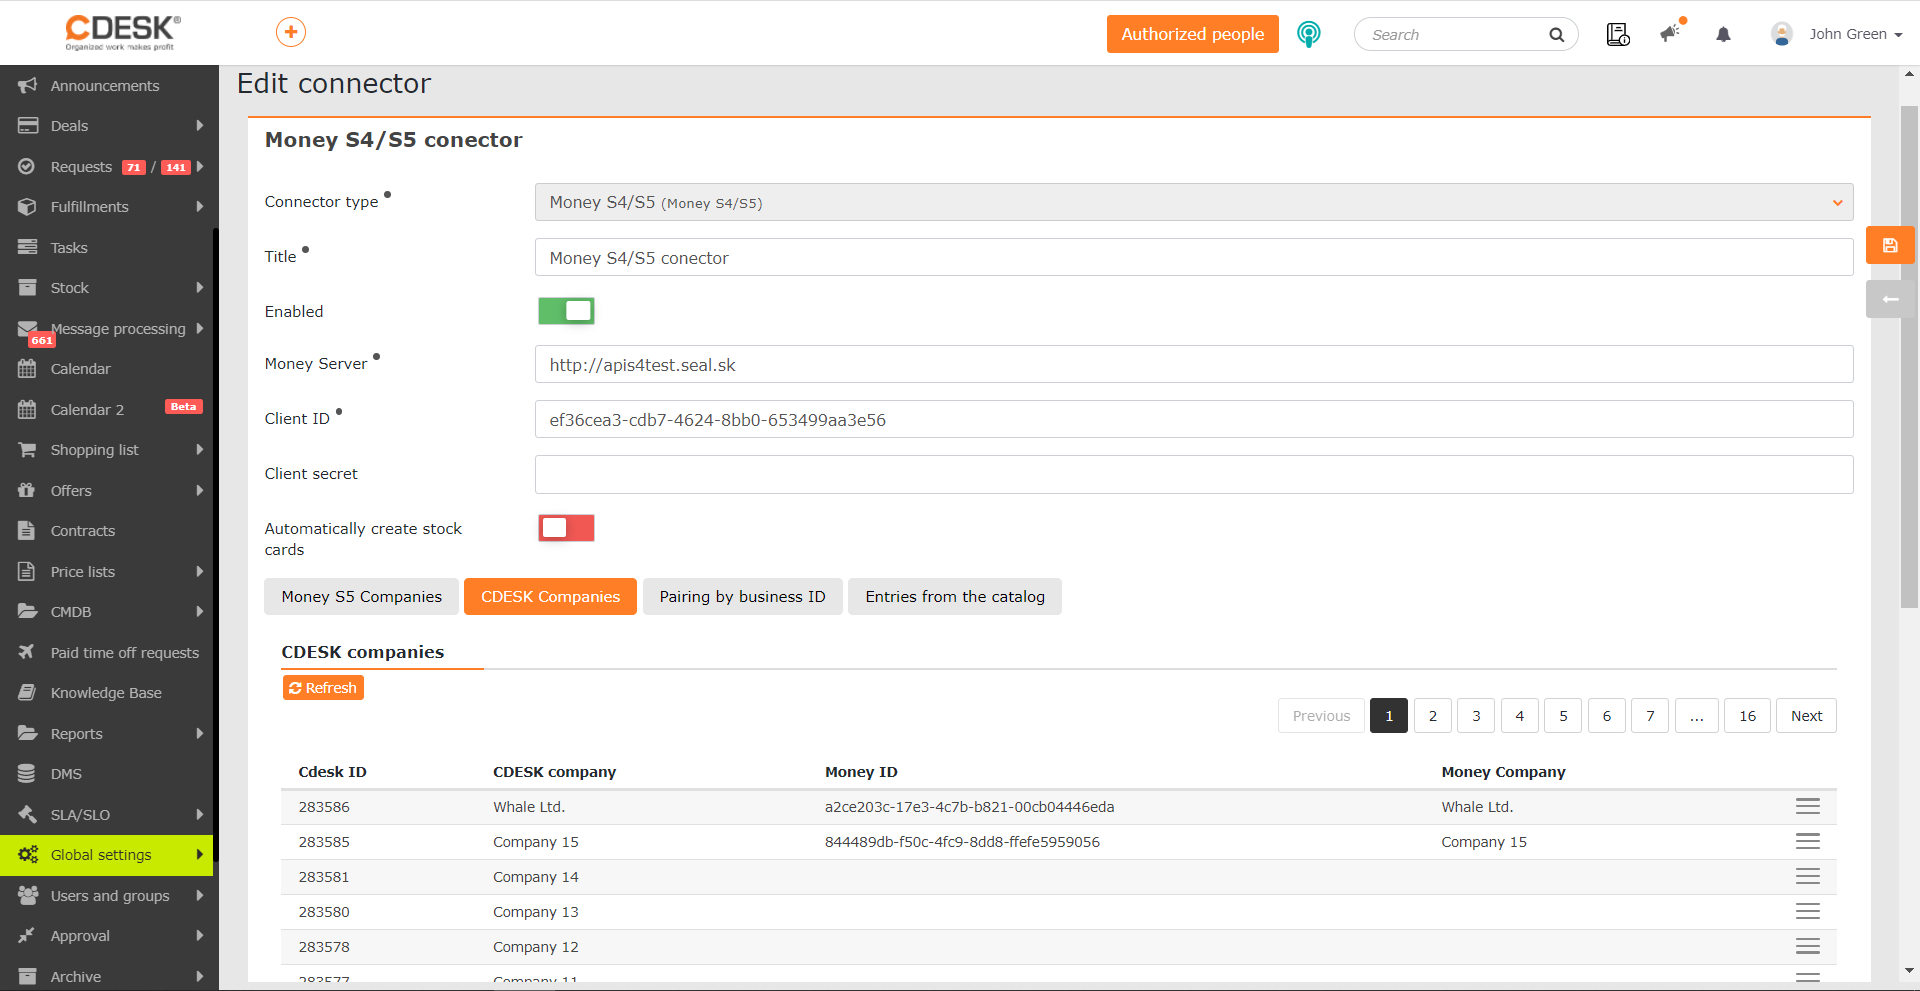
To create a company in Money S5, click on ![]() at the end of the CDESK line of the company you want to register and select Create a Company in Money S5.
at the end of the CDESK line of the company you want to register and select Create a Company in Money S5.
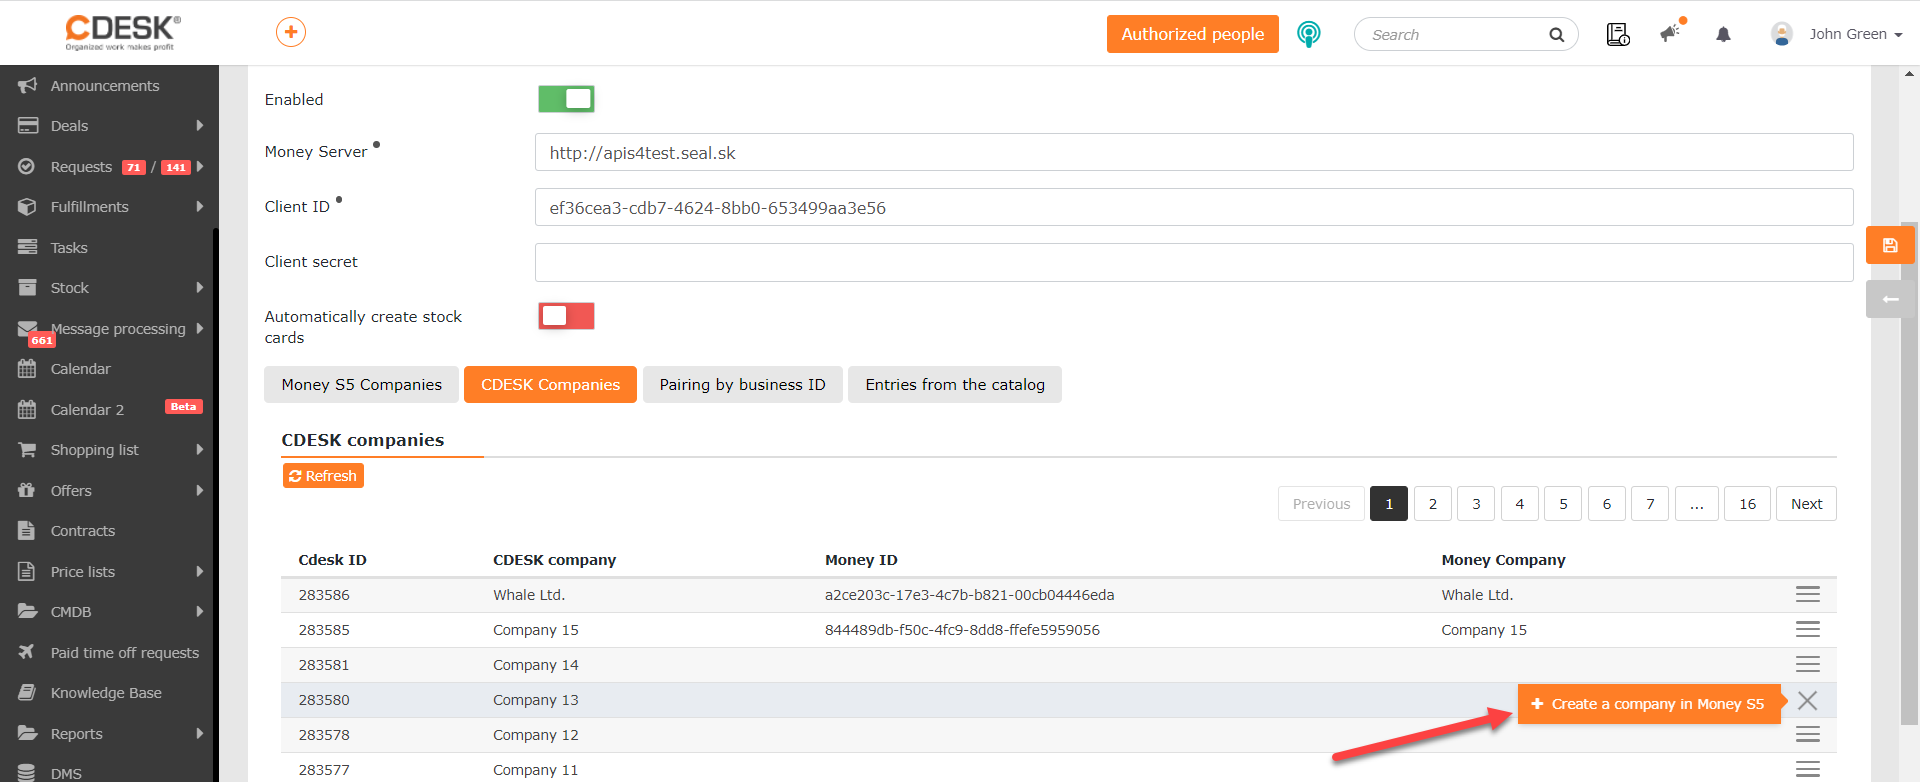
When a company is created in Money S5, its Money ID and name will be displayed in the CDESK line of the company under which it was created.
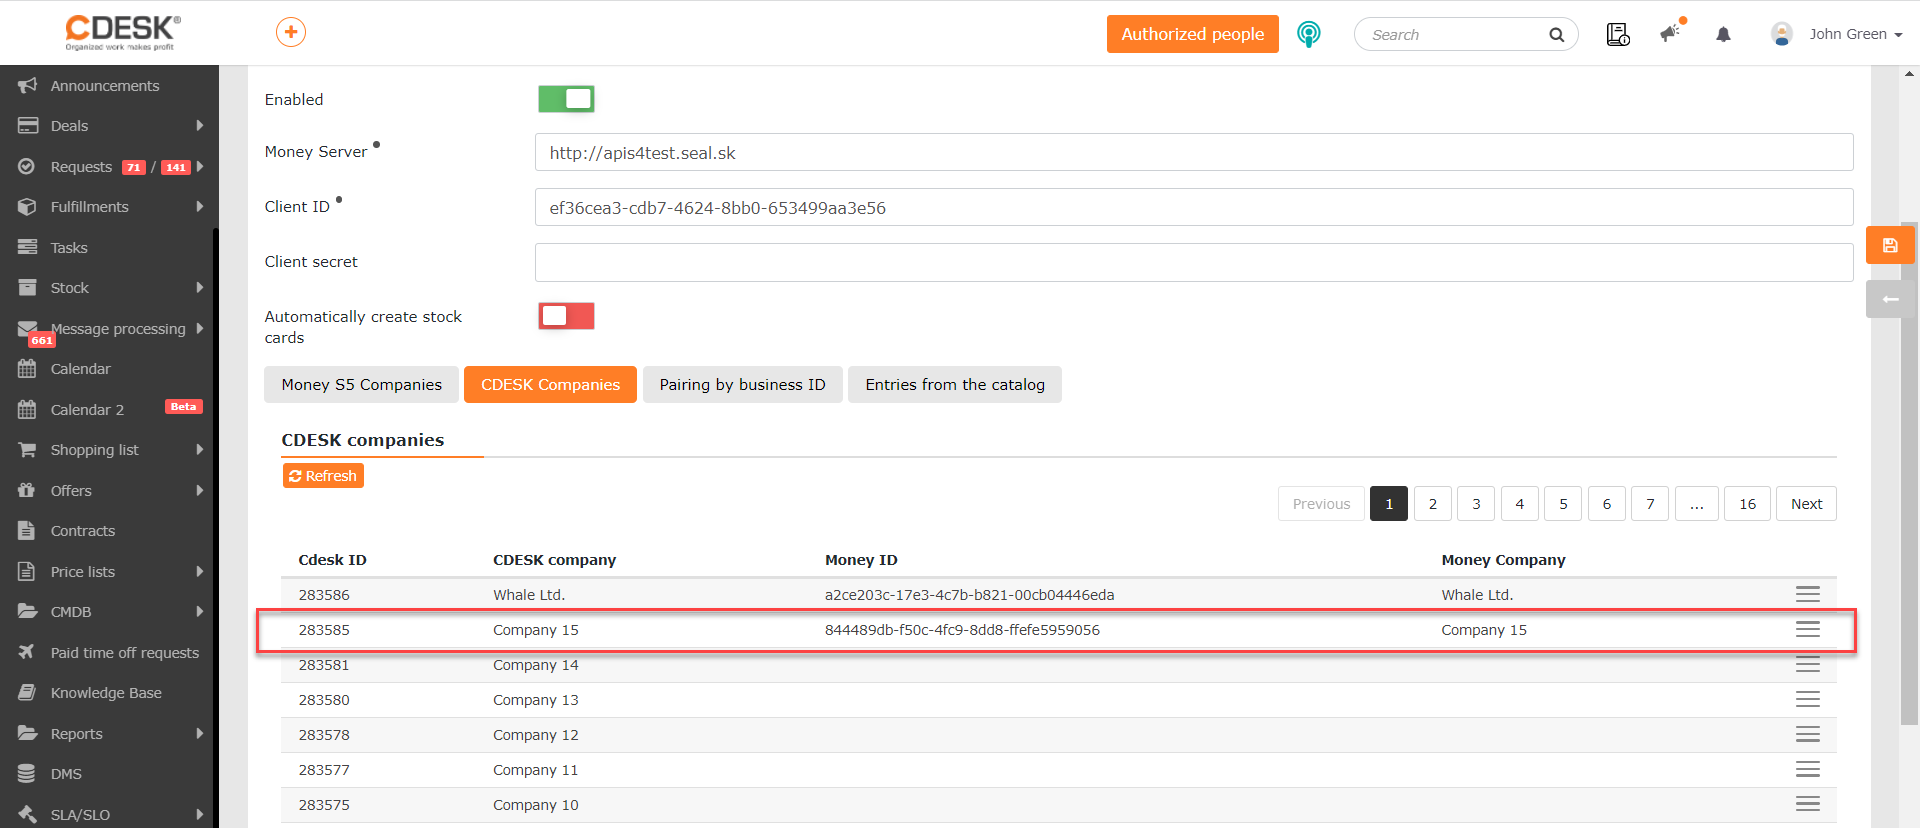
If needed, this link can be canceled. Click on ![]() and select the option Unlink the Company.
and select the option Unlink the Company.
Pair by Business ID
If it is found during synchronization of CDESK and Money server that companies from these two systems have the same Business ID, these companies will be displayed on the tab.
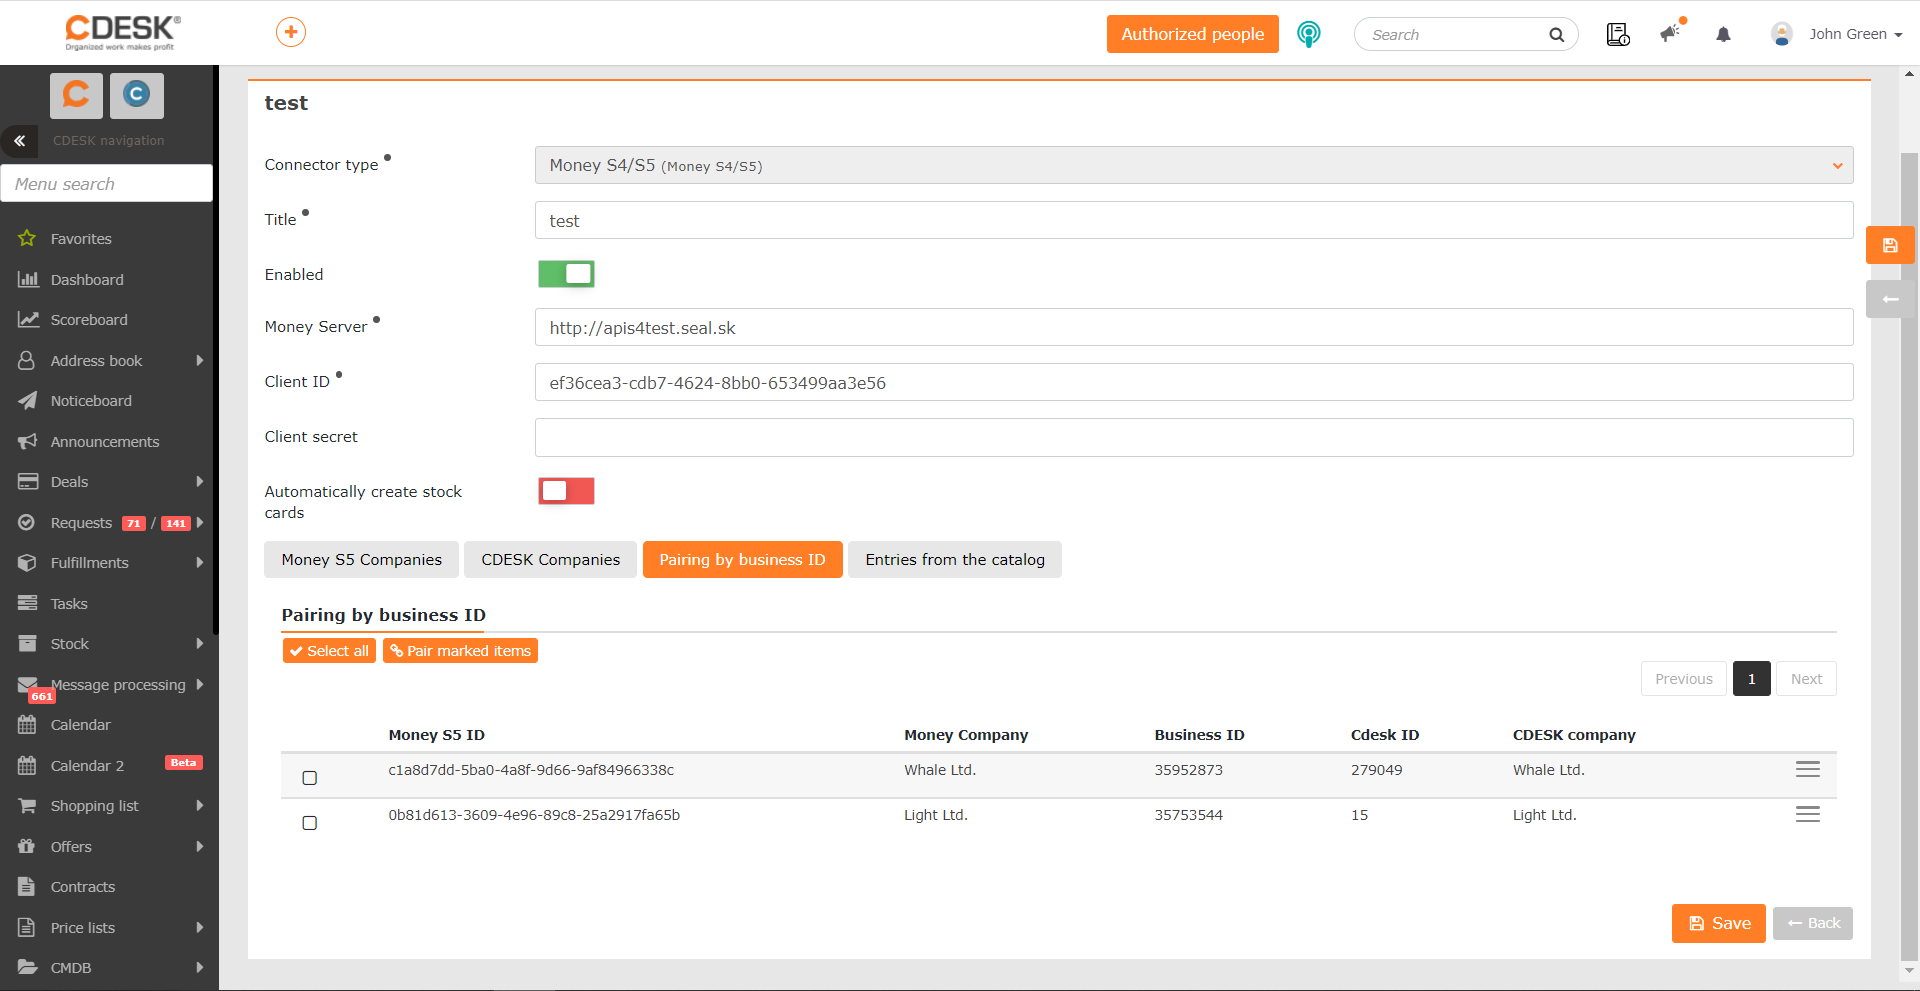
The list includes Money companies and their associated CDESK companies, based on a common business ID. However, these companies are not linked. To link a company, click on ![]() and select Link.
and select Link.

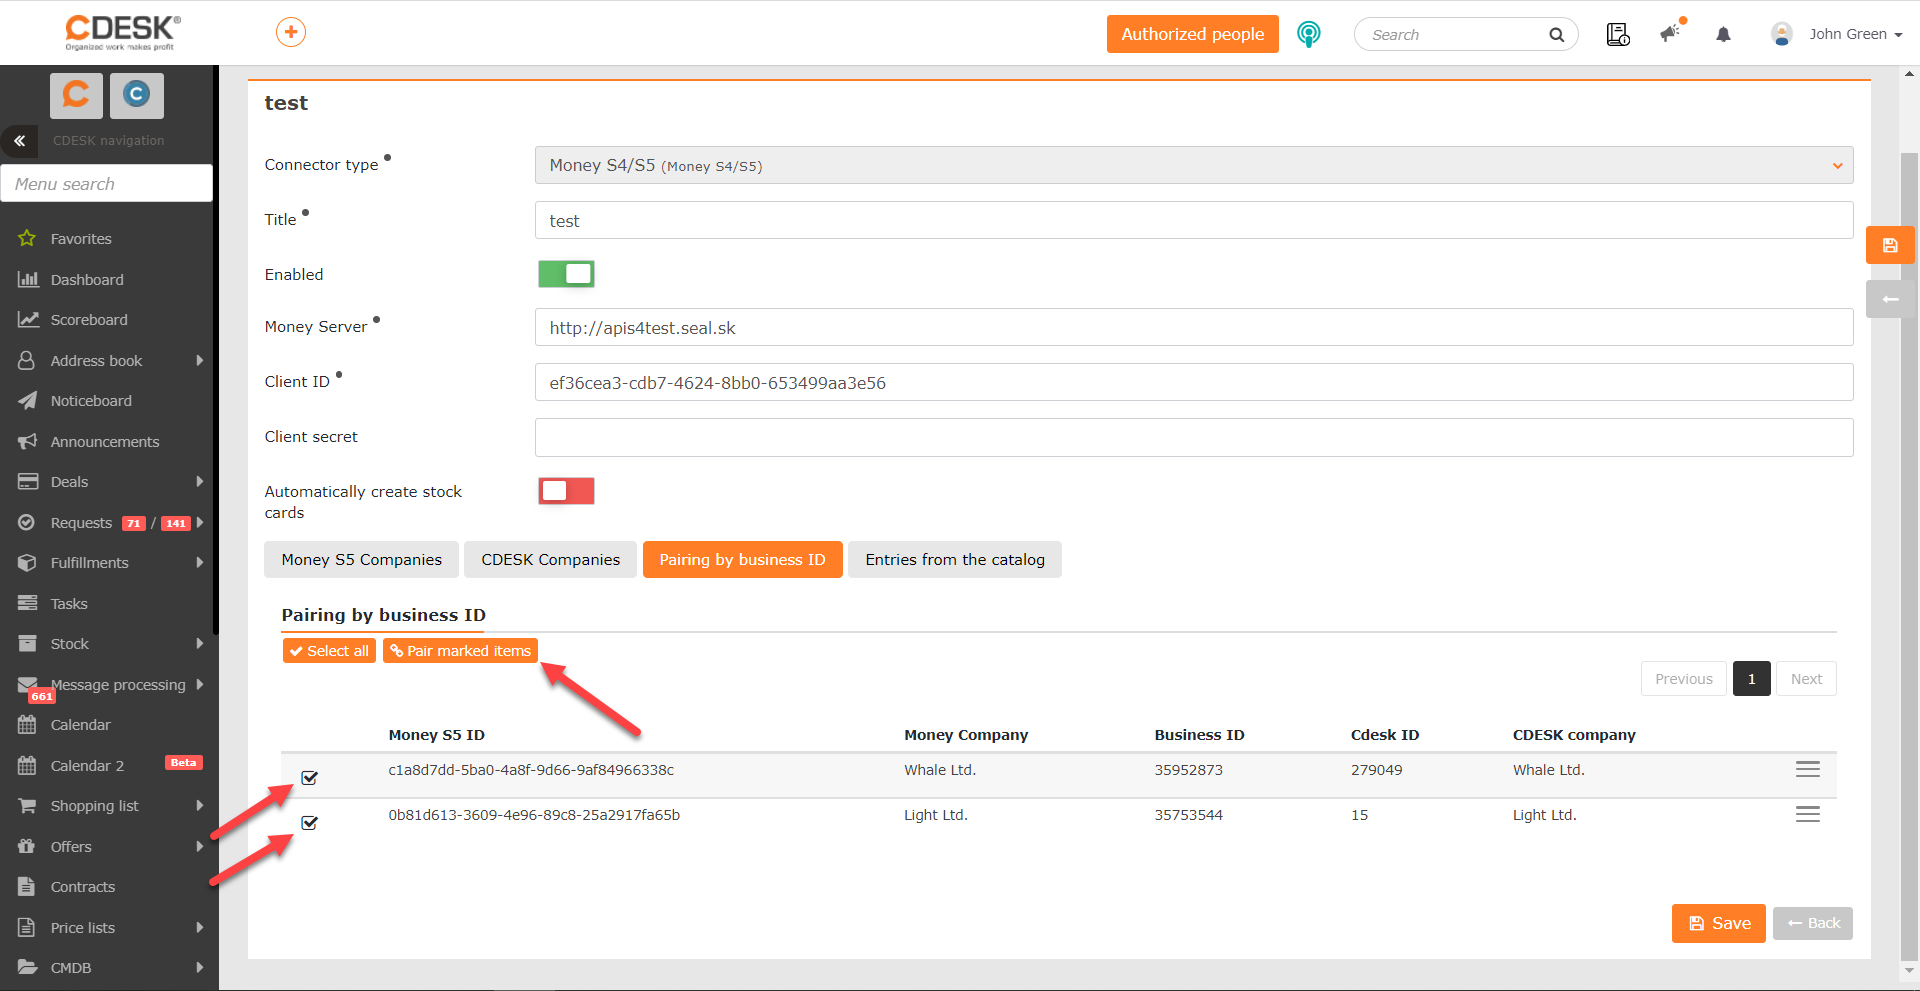
Companies can also be linked in bulk. Select the required companies in the list by clicking on the ![]() icon and then click on the Pair Selected Itemsbutton above the list. To link all paired companies in the list, click the Select All button and then click Pair Selected Items.
icon and then click on the Pair Selected Itemsbutton above the list. To link all paired companies in the list, click the Select All button and then click Pair Selected Items.
Create Stock Cards from Money S4/S5 Records
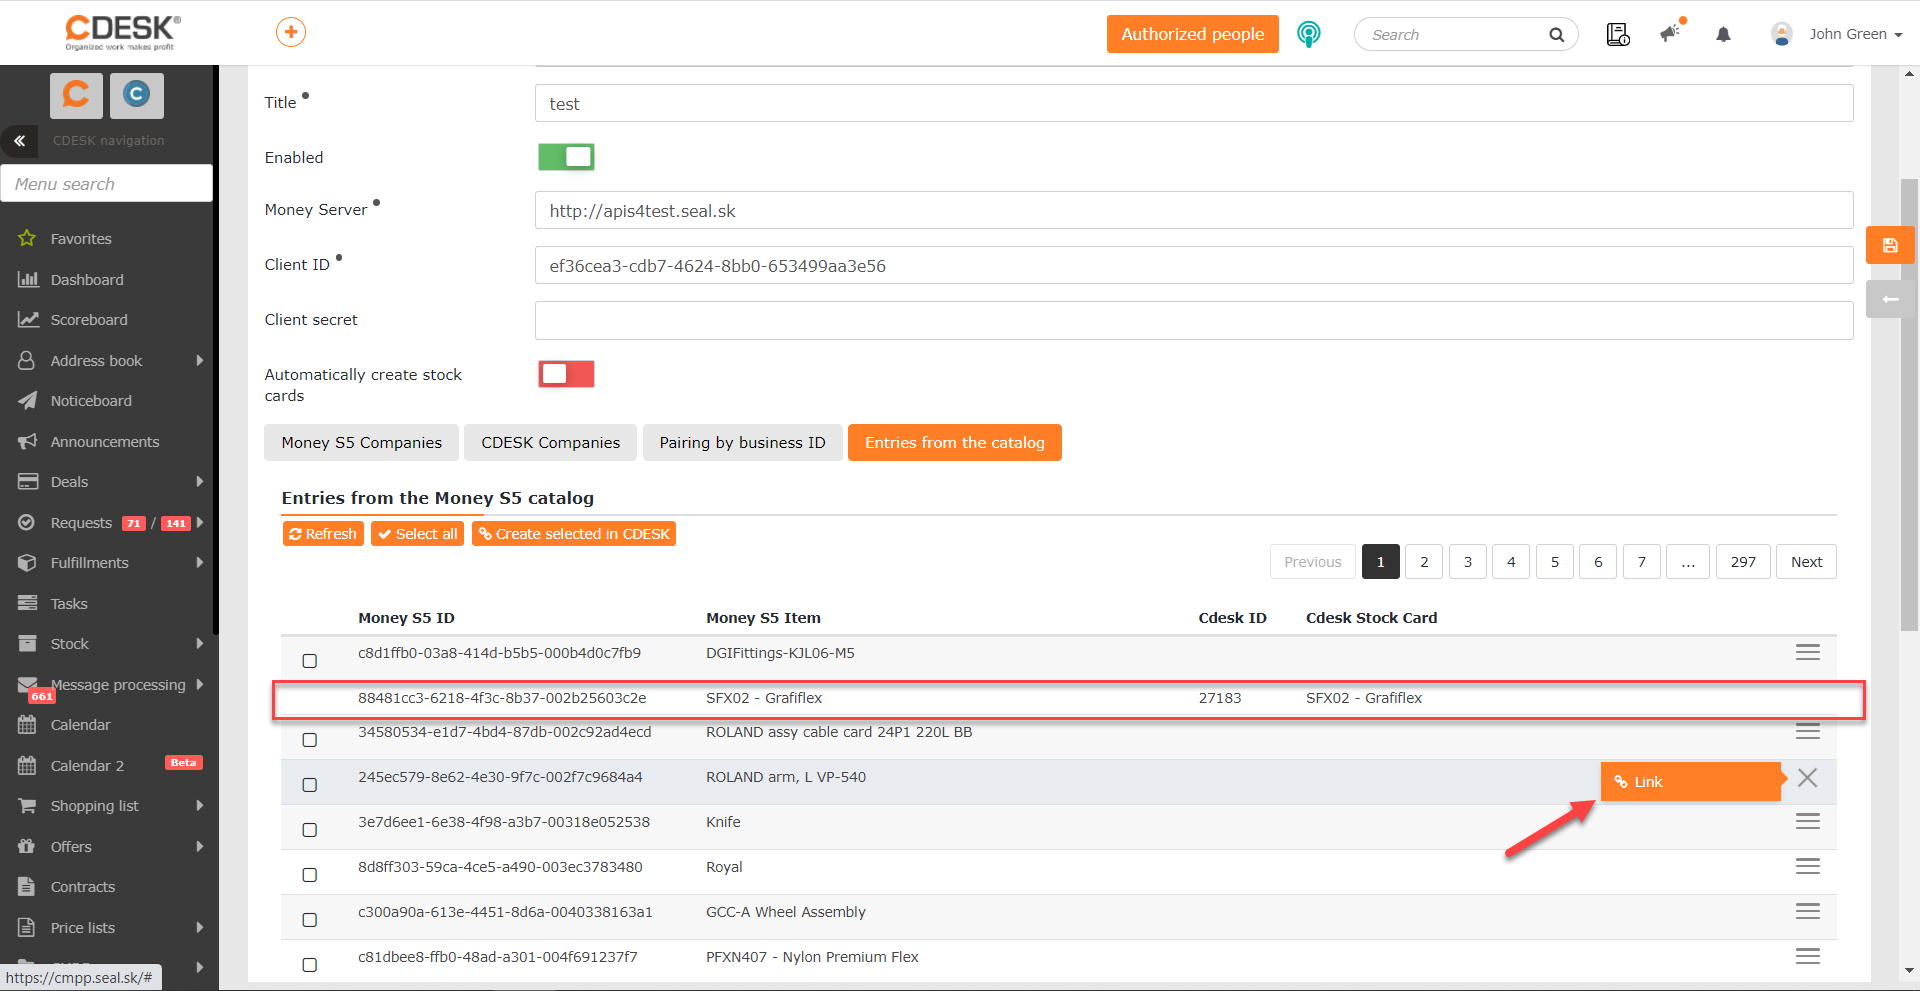
Stock cards are created automatically in CDESK when synchronizing with Money S4/S5 if you enabled the Automatically Create Stock Cards option when configuring the connector. If you have not enabled this option, you can manually create stock cards on the Entries from the Catalog tab. Stock cards from Money S4/S5 are loaded on the tab. If the list does not contain any items, click the Refreshbutton located in the left corner to start the synchronization. In the upper right corner, there is a tool that allows you to go through the pages of the list.
To create a stock card, click on ![]() and select Link. Once clicked, the details of the newly created CDESK stock card will be displayed in the row of the given Money S5 item.
and select Link. Once clicked, the details of the newly created CDESK stock card will be displayed in the row of the given Money S5 item.
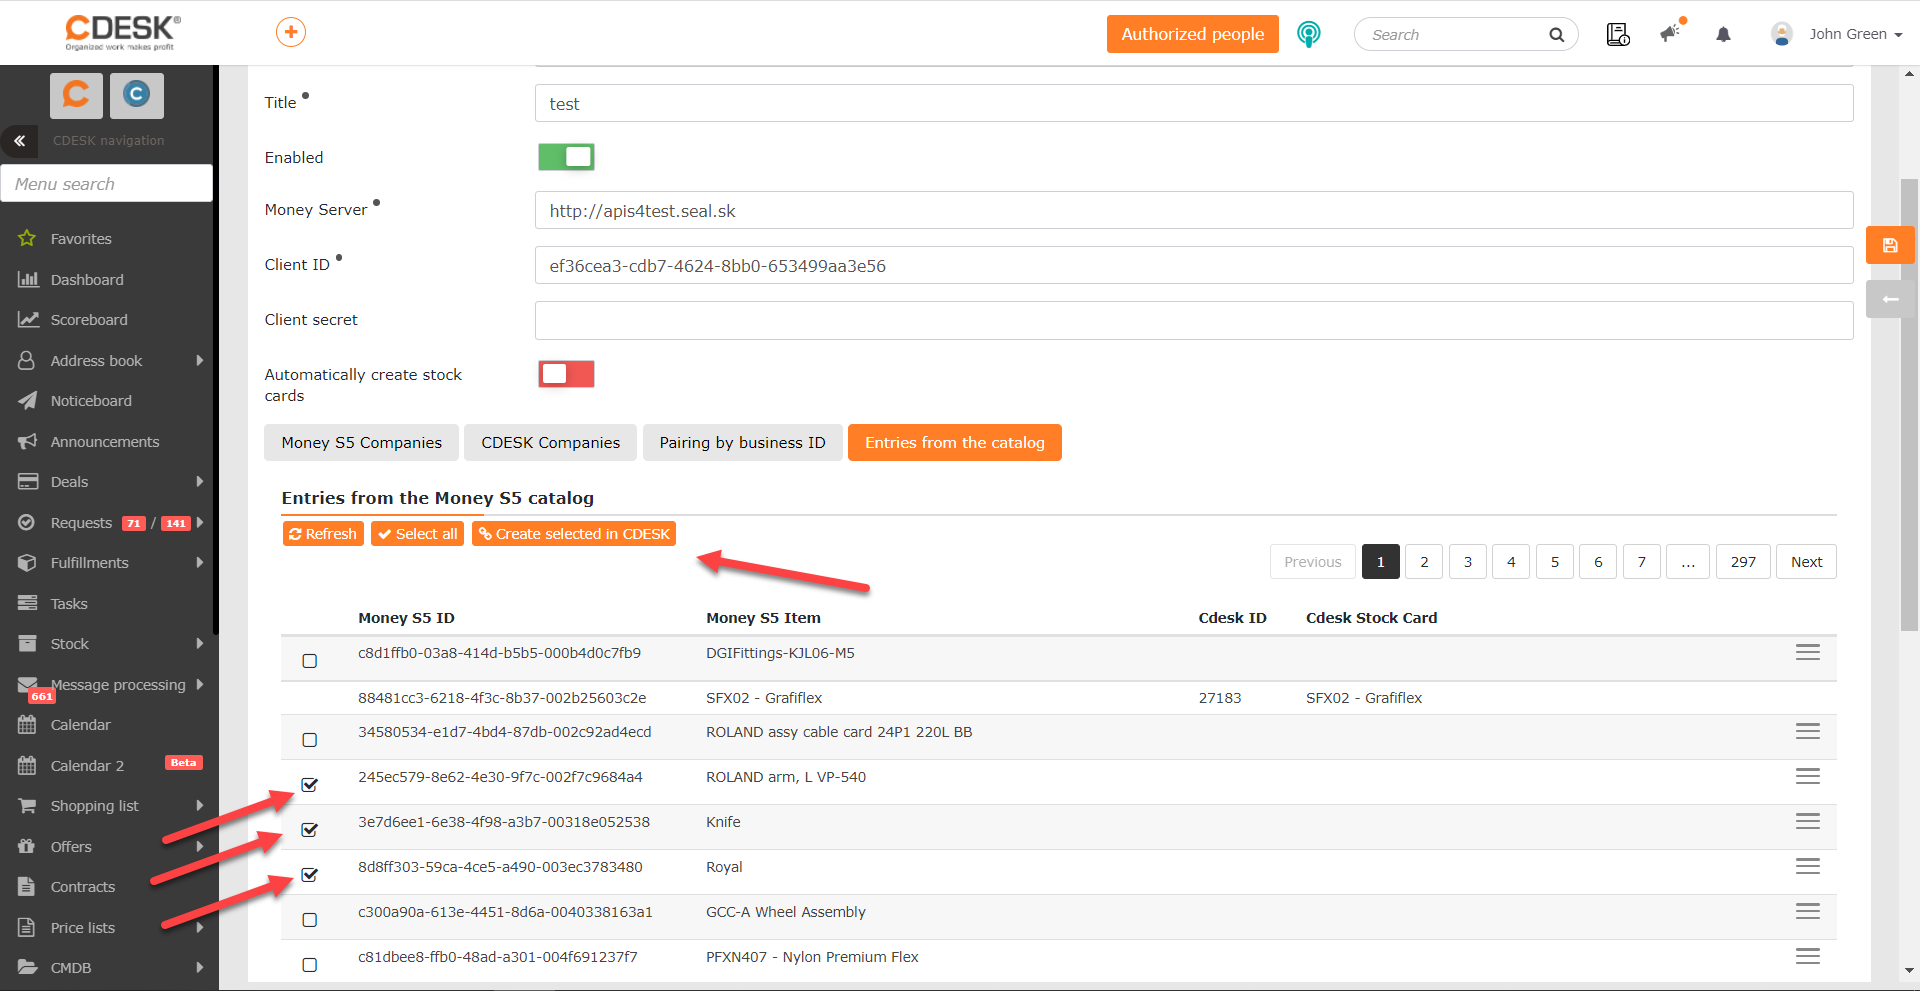
Stock cards can also be linked in bulk. Select the required records in the list by clicking on the ![]() icon and then click the Create Selected Items in CDESKbutton, located above the list. To link all paired companies in the list, click the Select All button and then click Create Selected Items in CDESK.
icon and then click the Create Selected Items in CDESKbutton, located above the list. To link all paired companies in the list, click the Select All button and then click Create Selected Items in CDESK.
Use of Money S4/S5 Connector – Create Orders for Invoicing
In the previous sections, the CDESK link to Money S4/S5 has been configured, based on which CDESK recognizes the companies from Money S4/S5 and the registered stock cards (Catalog). This allows CDESK to enter documents into Money S4/S5 that can be processed directly without further copying.
In the current version 3.1.0, the link is used to create Orders in Money S4/S5 from Request Account in CDESK.
- The order will be created for the company that is listed in the CDESK request (the CDESK company must be paired with a Money S4/S5 company, which is explained in the text above).
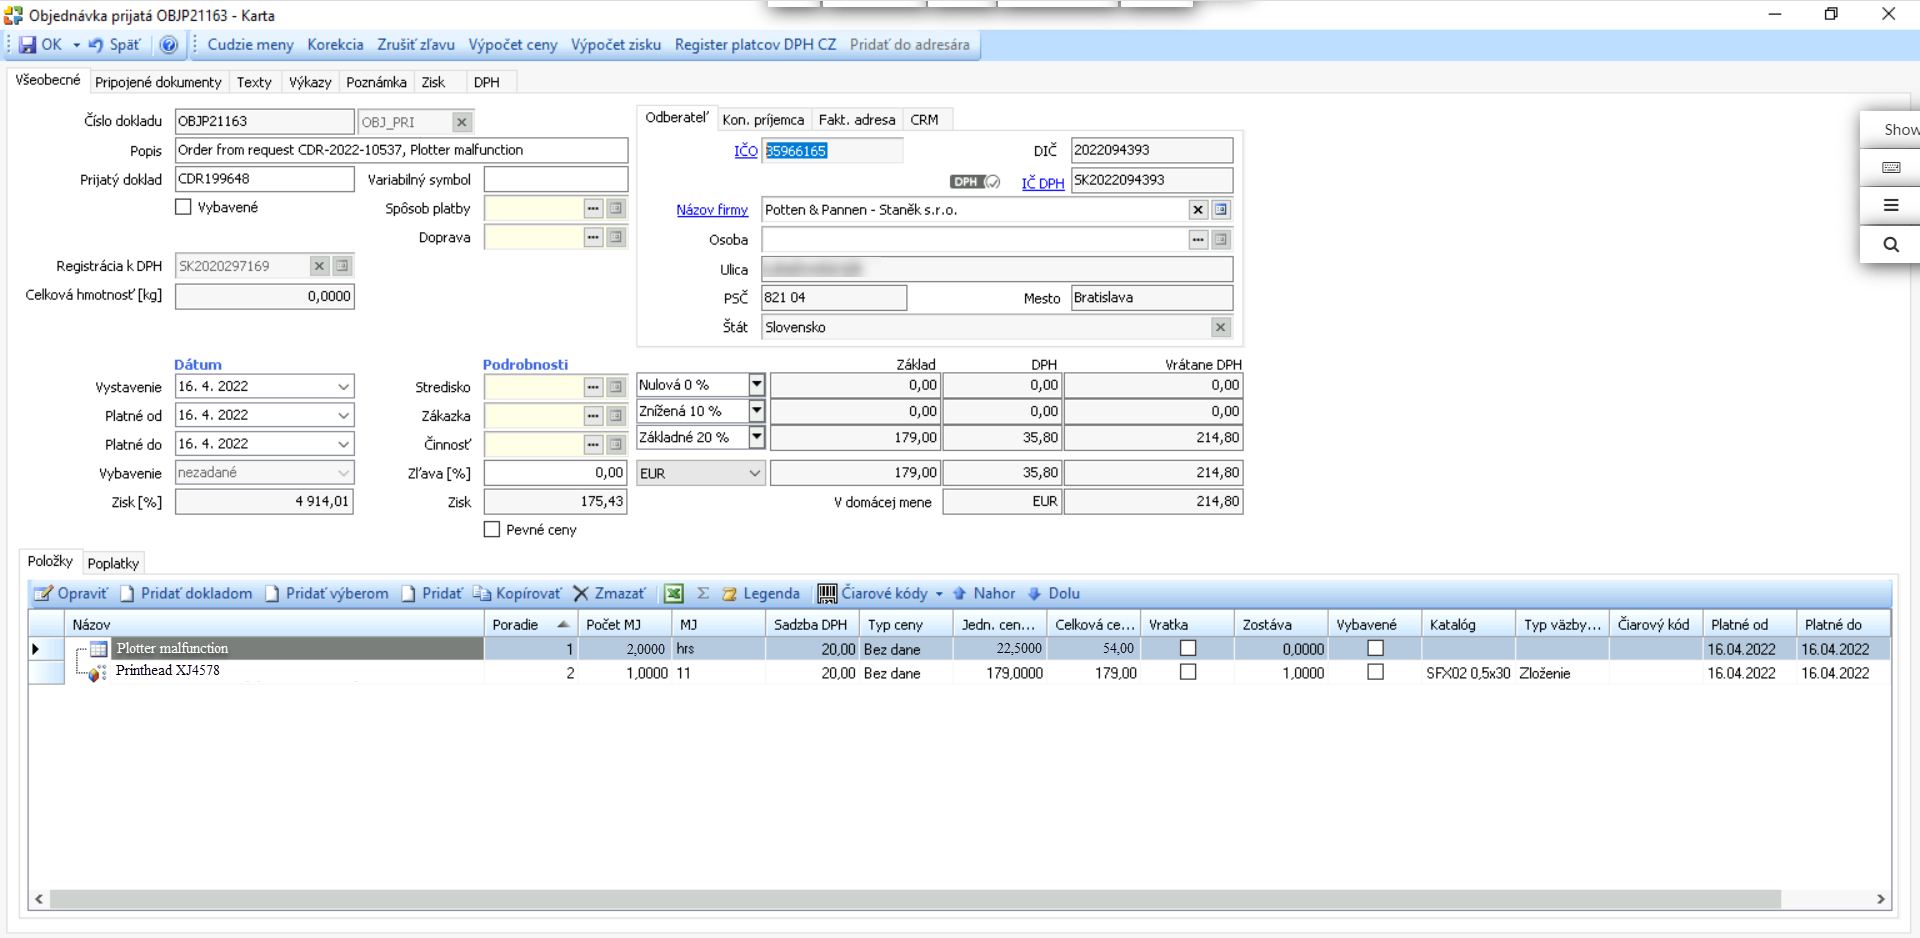
- Stock items that have been created from stock cards loaded into CDESK from Money S4/S5 will also be transferred to the order. (The transfer of stock cards is described in the text above.)
- The work for the order will be transferred with the text and the fee specified in the CDESK billing item. (See the following text for the billing items settings.)
To create a Money order, open a request that is for company with a link to Money S4/S5 company, has a deal associated with it, and contains fulfillments. Then go to the Request Account tab.

If no deal is linked to the request, the + Add Deal with Billing Item .button appears at the top. When clicked, a window appears to enter the name of the deal and then one to configure the billing item. The company from the request is automatically pre-filled as the customer on such a deal. For more information on configuring a billing item, see this text.If the request already has a deal added, the + Add a Billing Item to an Existing Deal .button appears at the top of the tab. This makes it possible to change the billing item on the linked deal.
The items that will be included in the account can be found in the Request Account Entries section. These are the fulfillments with the billing item and the stock issue slips linked to them, which were created by linking the Money items from the Catalog and the Stock Cards in CDESK. In the Items Not Included in the Request Account section, there are items from the fulfillments that are not linked to any billing item. Therefore, they will not be included in Money S4/S5 orders. To include them in the order, assign the billing item to the fulfillment on which the items are located. Further information about working with fulfillments can be found in this text.
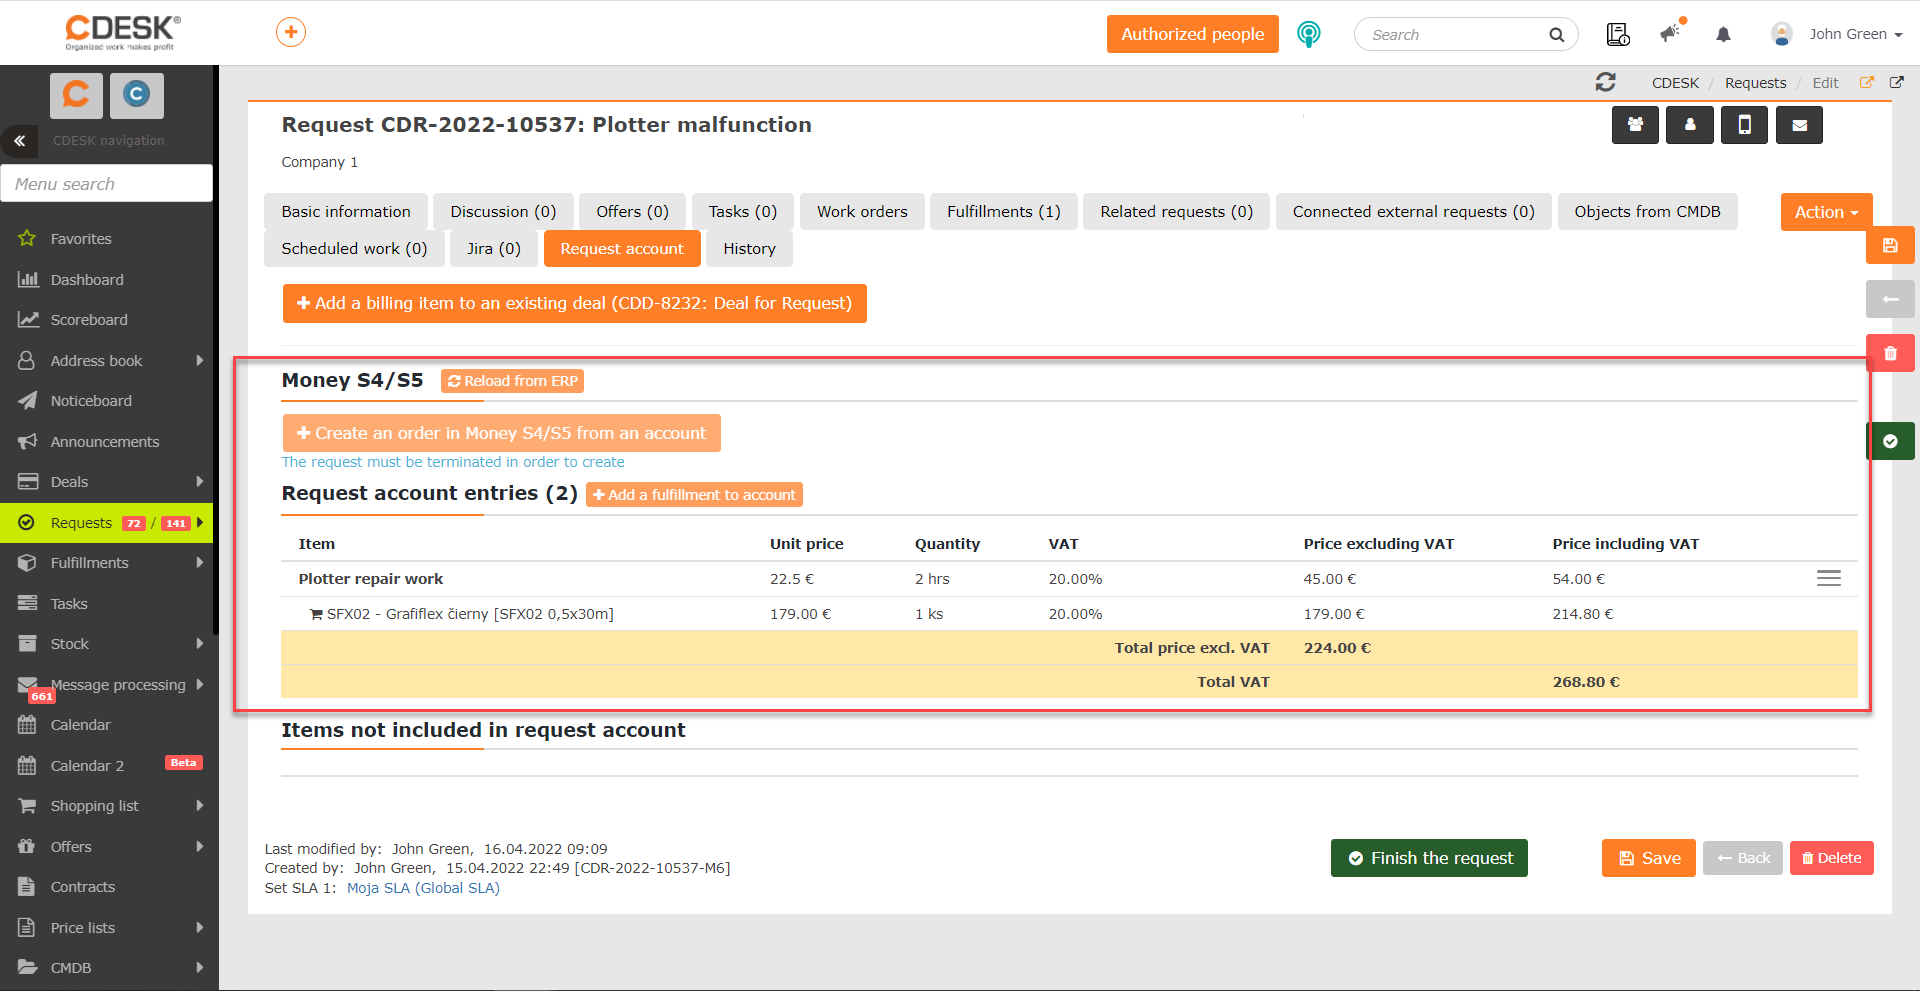
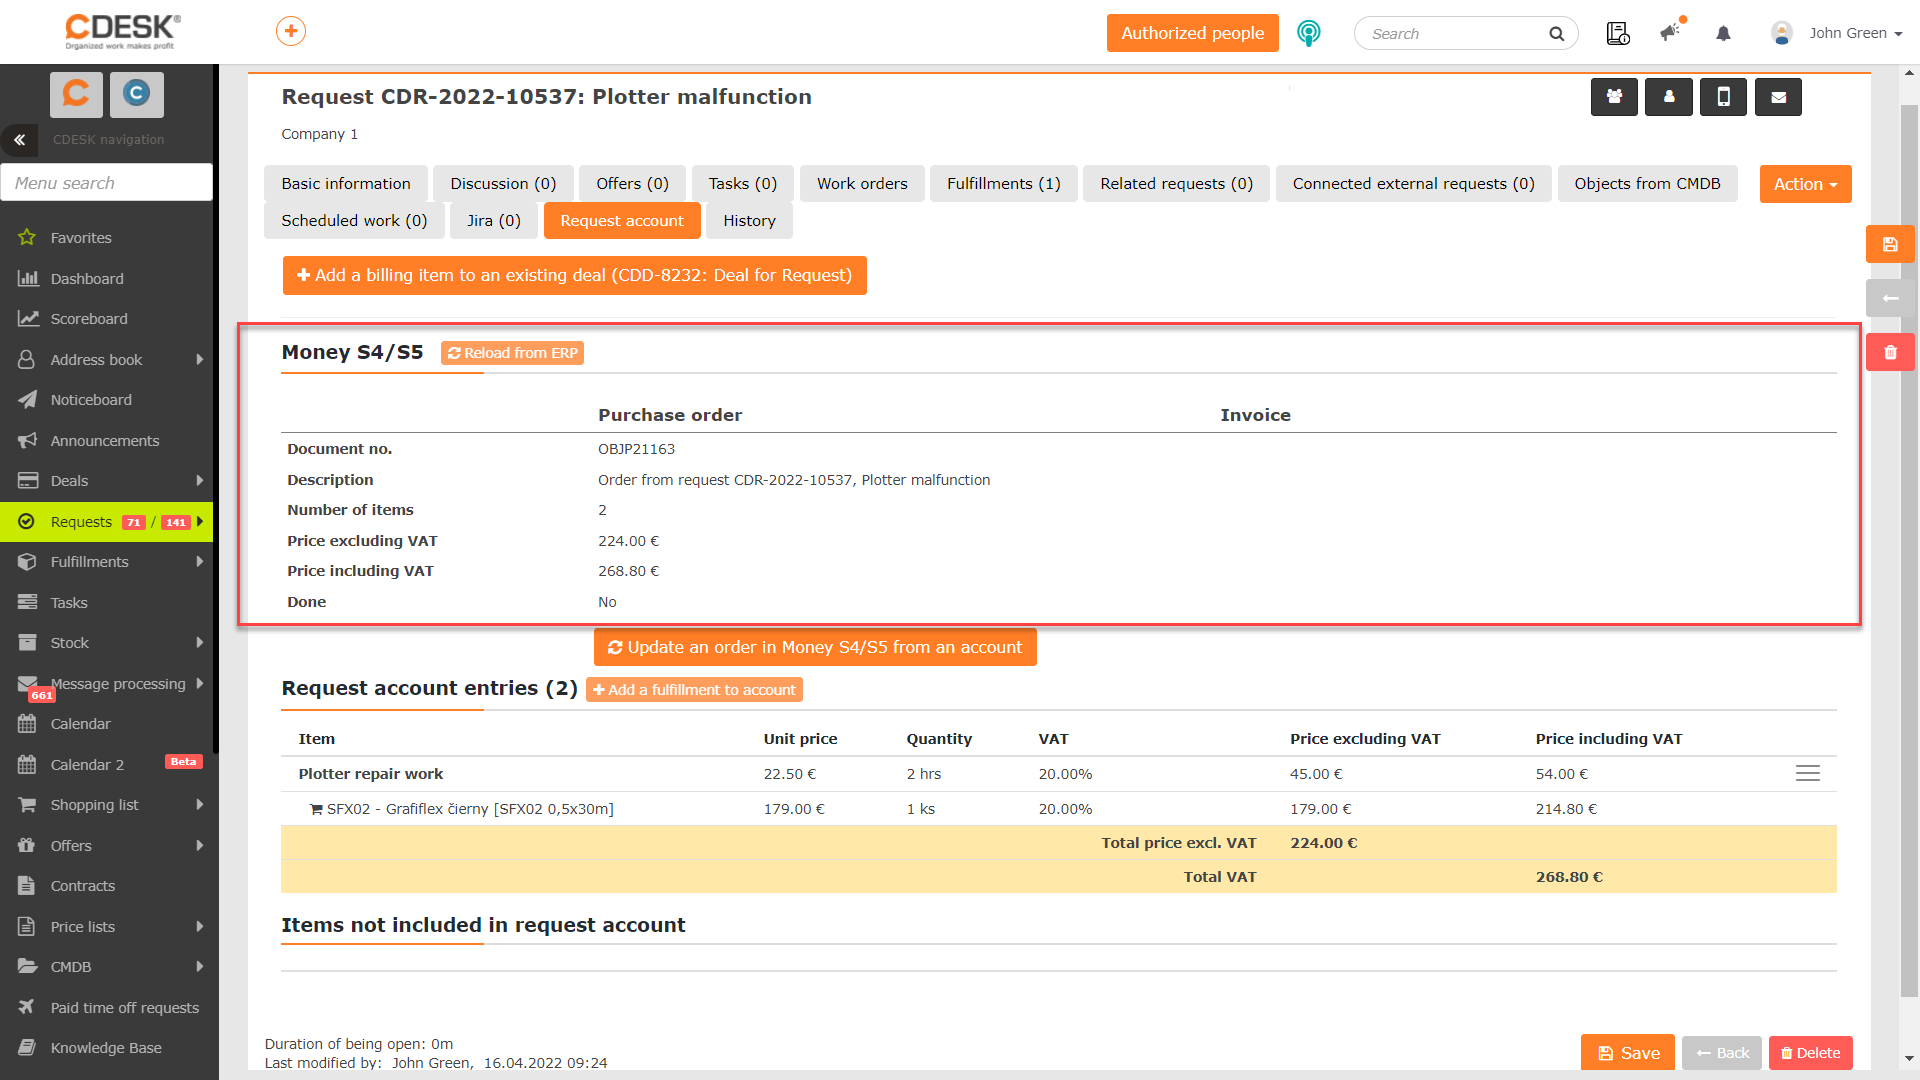
To create an order in Money S4/S5, click on the + Create an order in Money S4/S5 from an account, button which can be found in the Money S4/S5 section. This button is only available if the request is in Completed status.
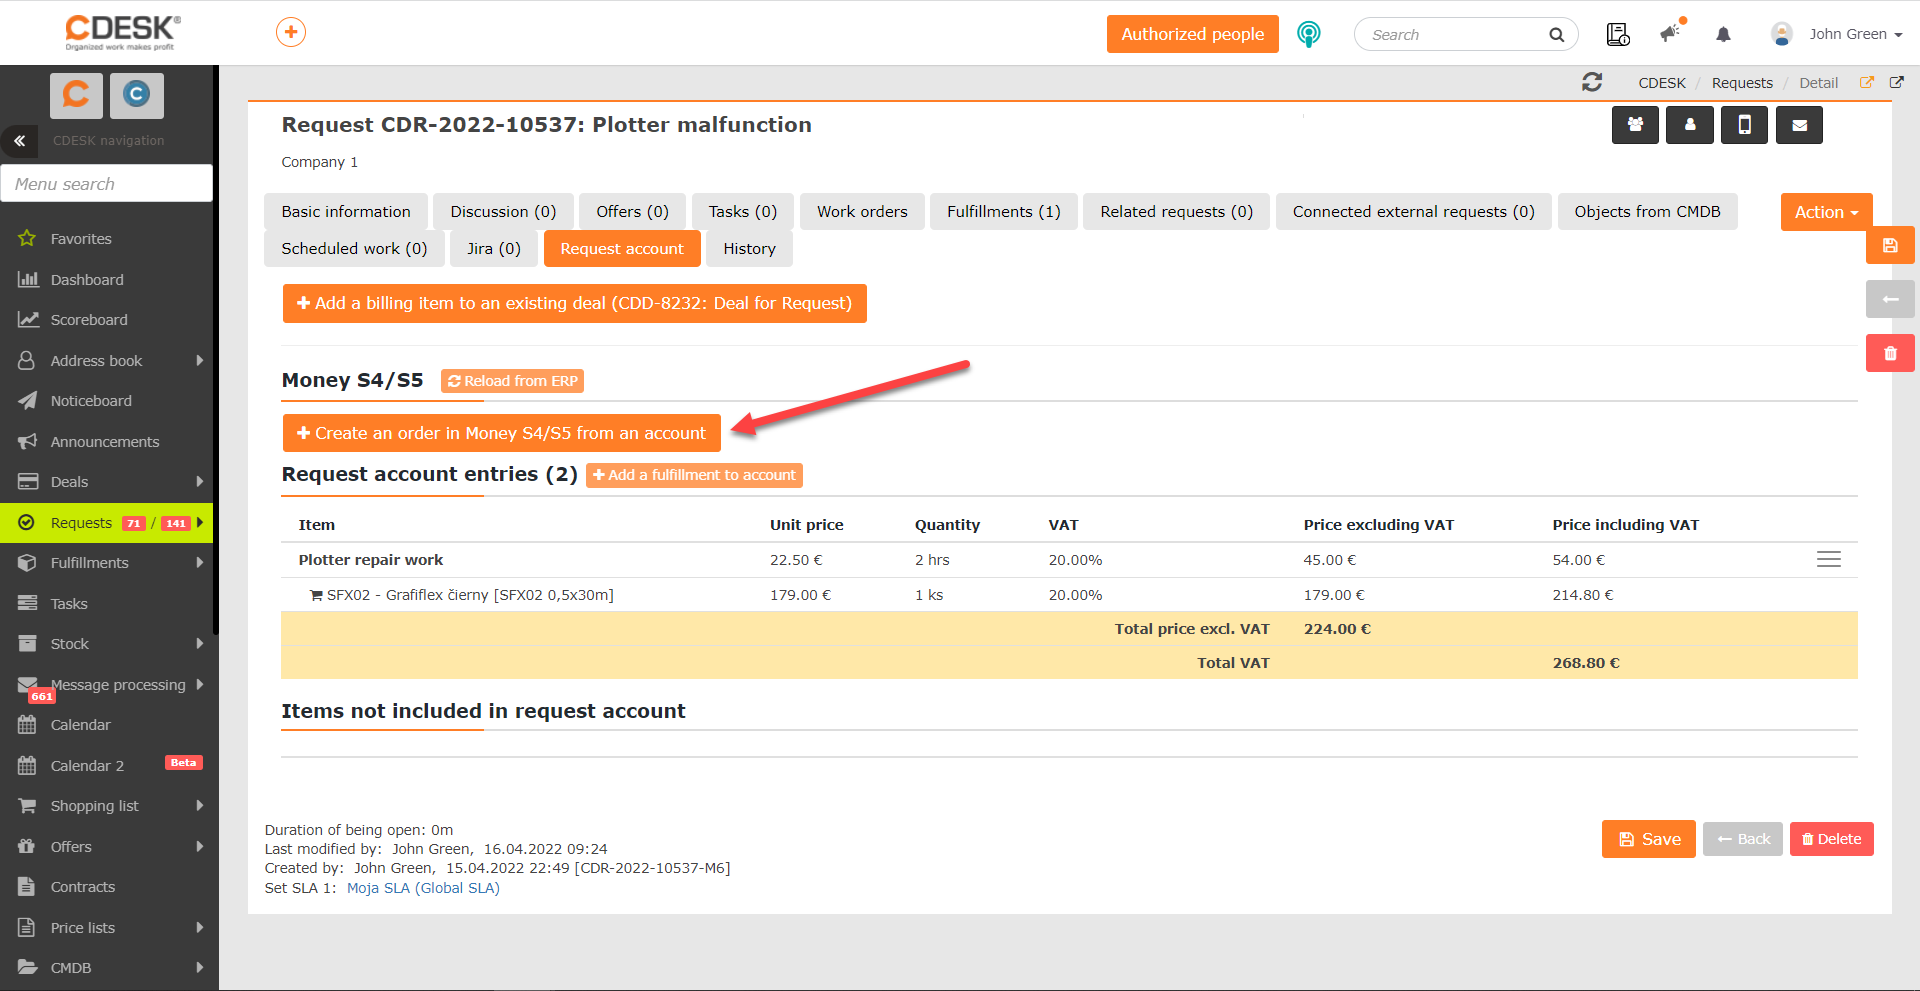
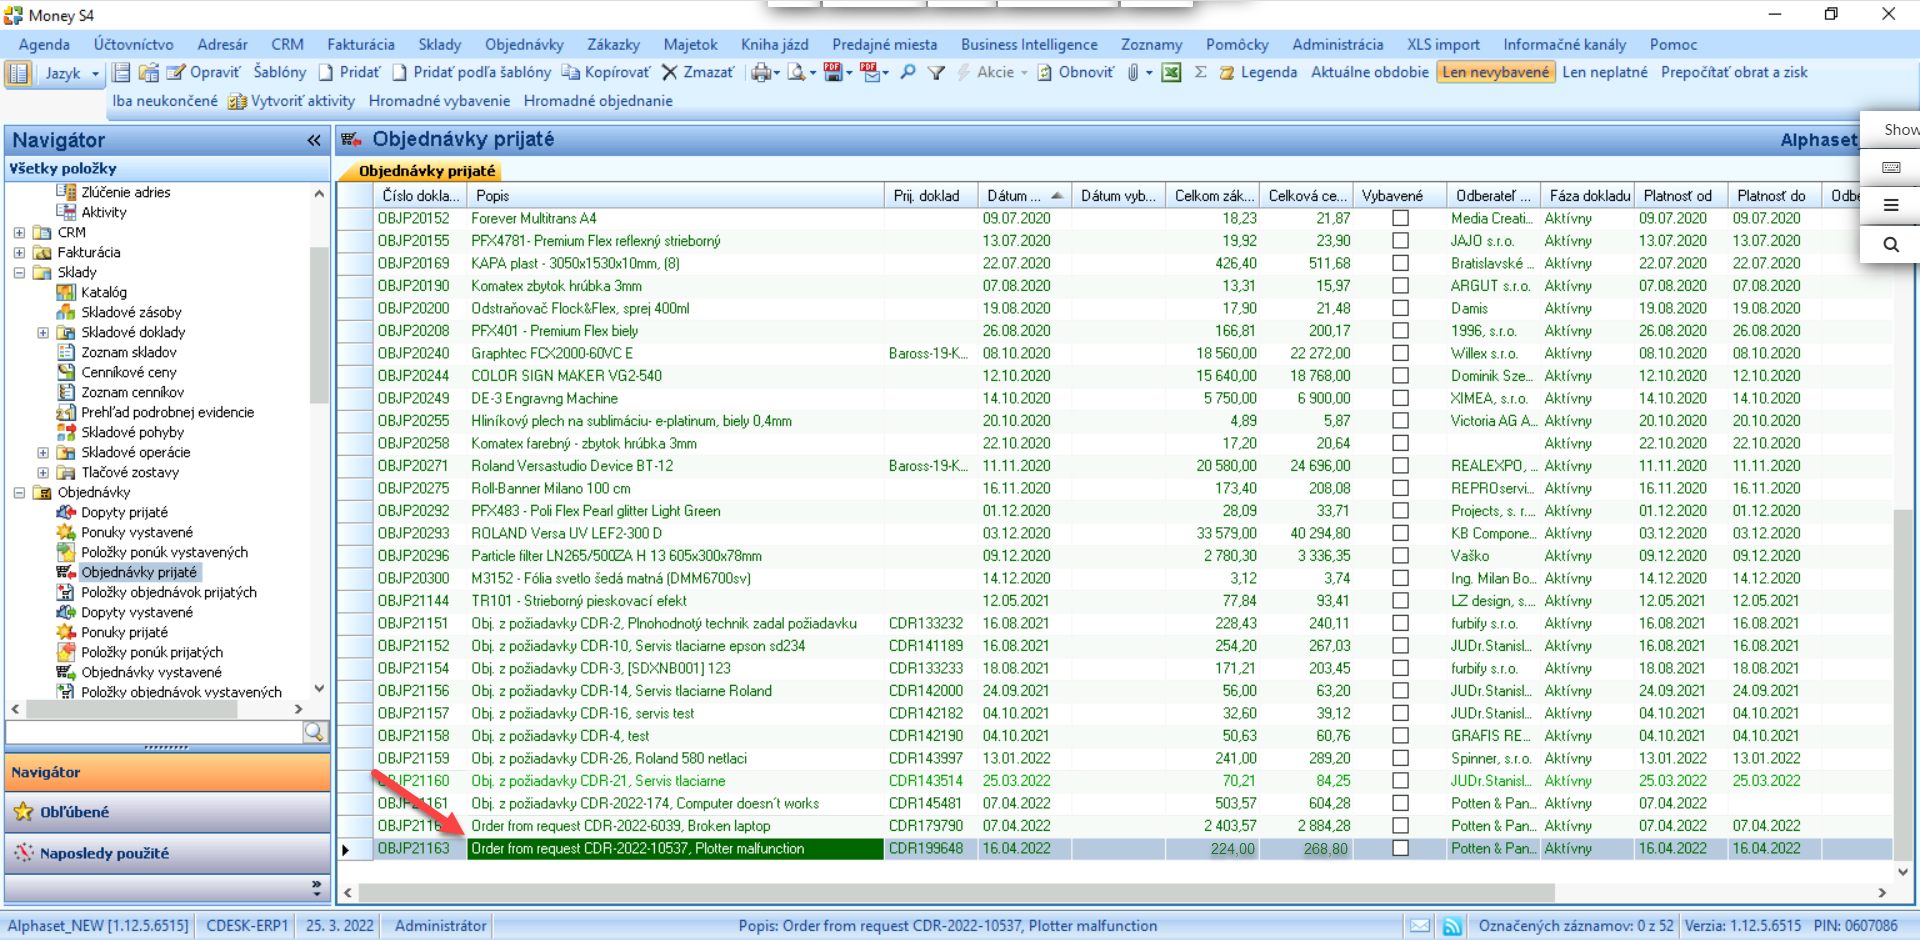
When clicked, you can see a message that the order has been created in Money S4/S5. At the same time, the summary of the order will be displayed in the Money S4/S5 section. Click the Update Order in Money S4/S5 from Account to update the contents of the Money S4/S5 order based on the most recent changes to the request.
